100% Guaranteed Genuine Parts
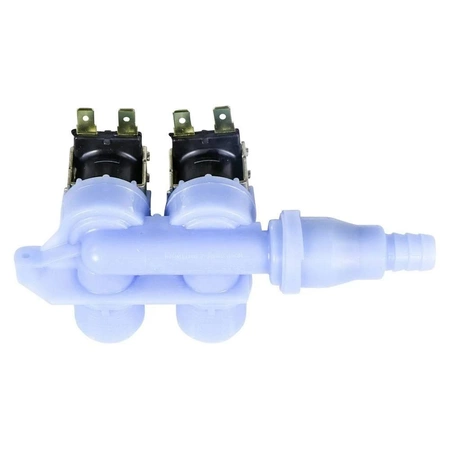
205547P Speed Queen Mixing Valve 4.4 Gpm 120V 50/60
SPQ 202395P has been replaced by SPQ 205547P. The Speed Queen Washer Mixing Valve 205547P is a genuine OEM (Original Equipment Manufacturer) part desgined for Speed Queen washing machines.
Weight : 0.37 lbs
Package Dimension : 5.35 x 4.49 x 2.17
Compatible Brands


About this product
SPQ 202395P has been replaced by SPQ 205547P. The Speed Queen Washer Mixing Valve 205547P is a genuine OEM (Original Equipment Manufacturer) part desgined for Speed Queen washing machines.
Weight : 0.37 lbs
Package Dimension : 5.35 x 4.49 x 2.17
DIY: How to Replace a 202395P Speed Queen Washer Water Inlet Valve
Replacing the water inlet valve on your Speed Queen washer requires basic tools and modest mechanical skills. With the right instructions you can easily complete the task and get your laundry area back in business.
Tools and Supplies Needed
•202395P replacement water inlet valve
•Phillips screwdriver
•Flat-head screwdriver
•Needle nose pliers
•Paper towels
Step 1: Shut off the water supply to your washing machine. If you have a combined hot and cold faucet, close both valves.
Step 2: Unplug the washing machine from the wall outlet to ensure that it does not accidentally turn on during the repair.
Step 3: Use the Phillips screwdriver to remove the two screws from the bottom of the washing machine. These screws are located directly below the washer door.
Step 4: Turn the washing machine over and access the backside of the machine. Locate the two water hoses connected to the water inlet valve and remove them with the needle nose pliers.
Step 5: Remove the screws that secure the water inlet valve to the washing machine by using a flat-head screwdriver.
Step 6: Slide the water inlet valve out of the machine and discard it.
Step 7: Insert the new 202395P replacement water inlet valve into the opening and secure it with the screws removed in Step 5.
Step 8: Reconnect the two water hoses to the water inlet valve.
Step 9: Wipe down the area around the new water inlet valve with a damp paper towel.
Step 10: Replace the screws to the bottom of the washing machine and plug it back into the wall.
Step 11: Turn the water supply to your washing machine back on.
That’s it! You’ve successfully replaced the water inlet valve on your Speed Queen washer. Enjoy cleaner clothes once again!
Please keep in mind, these instructions are for general guidance and should always be used in conjunction with the manufacturer's manual, if available.


