Online Sale!
100% Guaranteed Genuine Parts
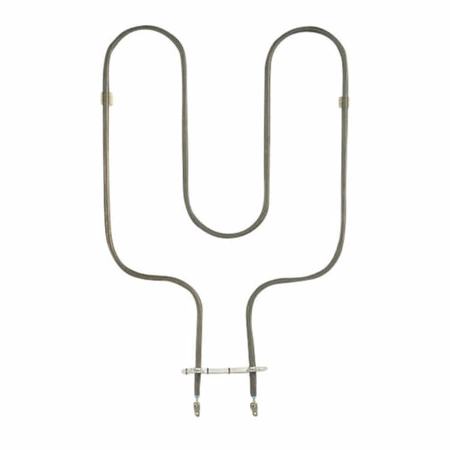
DE81-07509A Samsung Bake Element 2100W
Bake element, 2100w works with some Dacor models of stoves / ovens / ranges.
Compatible Brands

About this product
Bake element, 2100w works with some Dacor models of stoves / ovens / ranges.
The following parts are replaced by this product
- 62264
No more associated models for this part.
Step 1: Unplug the appliance from the wall socket and shut off the power source.
Step 2: Remove all shelves, trays and racks from inside the oven.
Step 3: Locate and remove the screws that secure the metal shield of the element. This is located above the oven cavity and will be necessary to gain access to the element.
Step 4: Use a flat head screwdriver to loosen the terminal connections of the element.
Step 5: Carefully remove the element from the oven and discard it in a safe manner.
Step 6: Insert the new Samsung DE81-07509A SVC-BAKE ELEMENT 2100W into the opening. Make sure to insert it in the proper orientation and securely fasten it in place.
Step 7: Reconnect the terminals using the flat head screwdriver. Make sure that the connections are secure.
Step 8: Replace the metal shield and secure it in place with the screws.
Step 9: Put all shelves, trays, and racks back into the oven.
Step 10: Plug the appliance back into the wall and turn on the power source.
Please keep in mind, these instructions are for general guidance and should always be used in conjunction with the manufacturer's manual, if available.
Please Verify Your Purchase to Submit a Review
Please note: We use this information only to confirm your purchase, it won’t be published.


