Online Sale!
100% Guaranteed Genuine Parts
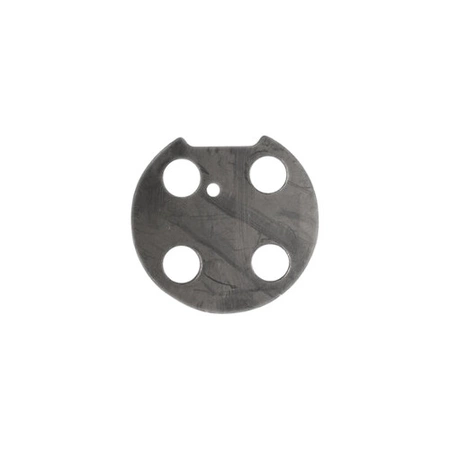
DE81-07024A Samsung Gasket Dual Burner Assembly
DE81-07024A Samsung Gasket Dual Burner
Weight : 0.22 lbs
Package Dimension : 7.01 x 3.90 x 1.14
Compatible Brands


About this product
DE81-07024A Samsung Gasket Dual Burner
Weight : 0.22 lbs
Package Dimension : 7.01 x 3.90 x 1.14
The following parts are replaced by this product
- 700145
No more associated models for this part.
DIY Guide to Replacing the Samsung DE81-07024A SVC-GASKET DUAL BURNER
If you’re looking for a way to replace the Samsung DE81-07024A SVC-GASKET DUAL BURNER, then you’ve come to the right place. This guide will provide you with step-by-step instructions on how to easily complete the replacement on your own. So, what are you waiting for? Let’s get started!
STEP 1: Gather Your Supplies – Before you begin the replacement process for the Samsung DE81-07024A SVC-GASKET DUAL BURNER, it is important to gather all of the necessary tools and supplies. You will need a screwdriver, pliers, new gas supply line, and burner gasket.
STEP 2: Unplug the range – For safety reasons, it is important to unplug the range before attempting any repairs. This will help to avoid any electrical shock and ensure that you aren’t at risk of injury.
STEP 3: Remove the Burner – Now it’s time to remove the existing burner. Use your screwdriver to unscrew the screws that hold the burner in place and then carefully lift it off of the range.
STEP 4: Install the New Burner Gasket – Place the new burner gasket onto the burner and make sure that it is properly secured. Then, reattach the burner to the range using the screws.
STEP 5: Connect the Gas Supply Line – Take the gas supply line and connect it to the burner. Make sure that both ends of the line are securely attached.
STEP 6: Test the Burner – Before you consider your repair job complete, it’s important to test the burner. Ensure that it is working properly by turning it on and off a few times. If everything is working correctly, then your replacement is done!
By following these steps, you should have no trouble replacing your old Samsung DE81-07024A SVC-GASKET DUAL BURNER with a brand new one. Just be sure to follow all safety protocols and pay attention to each step as you go through the process. Good luck!
Please keep in mind, these instructions are for general guidance and should always be used in conjunction with the manufacturer's manual, if available.


