Online Sale!
100% Guaranteed Genuine Parts
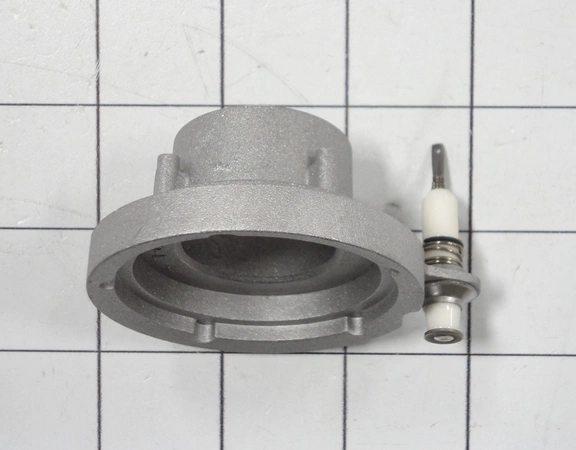
DE81-05380A Samsung Complete Burner Head
Introducing the Samsung DE81-05380A SVC-BURNER HEAD COMPLETE, . We're your #1 source for genuine OEM appliance parts. Contact us for further questions as well as any other appliance parts needs!
Weight : 0.09 lbs
Dimension : 2.56 x 2.56 x 1.97
Compatible Brands

About this product
Introducing the Samsung DE81-05380A SVC-BURNER HEAD COMPLETE, . We're your #1 source for genuine OEM appliance parts. Contact us for further questions as well as any other appliance parts needs!
Weight : 0.09 lbs
Dimension : 2.56 x 2.56 x 1.97
The following parts are replaced by this product
- 62951
- 82681
- 86398
No more associated models for this part.
Step 1 – Shut off all electricity to the oven.
Step 2 – Unplug the oven and remove the back oven panel to access the burner head.
Step 3 – Loosen the screws holding the burner head in place and carefully remove it.
Step 4 – Inspect the replacement Samsung DE81-05380A SVC-Burner Head Complete to make sure it is undamaged and properly sized.
Step 5 – Place the new burner head into position, securing with the screws.
Step 6 – Plug the oven back in and restore power.
Step 7 – Test the burner by turning the knob and lighting the oven.
Step 8 – If necessary, adjust the flame size for even heat distribution.
Step 9 – Close the back oven panel and enjoy your working oven!
Please keep in mind, these instructions are for general guidance and should always be used in conjunction with the manufacturer's manual, if available.
Write Your Own Review


