Online Sale!
100% Guaranteed Genuine Parts
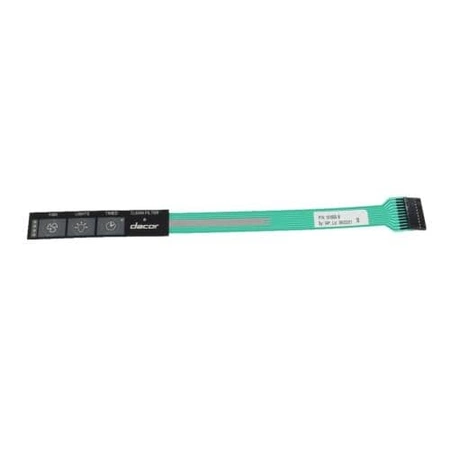
DE81-05296A Samsung Membrane Switch Panel Assembly
Membrane switch panel works with some Dacor models of range hoods.
Weight : 0.05 lbs
Package Dimension : 10.98 x 1.69 x 0.35
Compatible Brands

About this product
Membrane switch panel works with some Dacor models of range hoods.
Weight : 0.05 lbs
Package Dimension : 10.98 x 1.69 x 0.35
The following parts are replaced by this product
- 101655
No more associated models for this part.
DIY Guide to Replacing the Samsung DE81-05296A SVC-MEMBRANE SWITCH PANEL
Replacing the Samsung DE81-05296A SVC-Membrane Switch Panel is a task that is easily undertaken by most do-it-yourselfers. This step-by-step guide will provide you with the necessary instructions to successfully complete this job.
Step 1: Gathering Materials
In order to begin the process of replacing the Samsung DE81-05296A SVC-Membrane Switch Panel, you will need to have the following items ready:
• Phillips head screwdriver
• Pliers
• New Samsung DE81-05296A SVC-Membrane Switch Panel
Step 2: Accessing the Switch Panel
Start by unplugging the appliance to avoid electrocution. To access the switch panel, you’ll need to locate it behind the control panel. Using your Phillips head screwdriver, remove the screws attaching the control panel to the wall and carefully lift it free.
Step 3: Disconnecting the Power Cords
Once the control panel is removed, you will be able to see the switch panel. To disconnect the power cords from the back of the switch panel, use pliers to loosen the clamps that are holding them in place. Once the clamps are loosened, you can then pull the power cords off of the switch panel.
Step 4: Installing the New Switch Panel
Take the new Samsung DE81-05296A SVC-Membrane Switch Panel and attach the power cords to the back of it. Make sure that the clamps are tightened securely to ensure the safety of the connection. Once the cords are connected, you can then mount the new switch panel in the same position as the old one.
Step 5: Finishing Up
The final step is to reattach the control panel. Use the screws that you removed earlier and tighten them in place. Once all of the screws are secure, you can then plug the appliance back in and test the switch panel to make sure it is working.
Congratulations! You have successfully replaced the Samsung DE81-05296A SVC-Membrane Switch Panel. With the help of this DIY guide, you can now take on this repair task all on your own.
Please keep in mind, these instructions are for general guidance and should always be used in conjunction with the manufacturer's manual, if available.


