Online Sale!
100% Guaranteed Genuine Parts
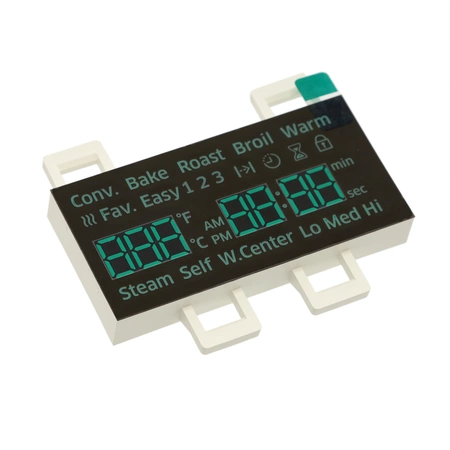
DE07-00129A Samsung Range LED Display
Maintain the functionality of your Samsung oven with this high-quality LED display component. Designed specifically as a replacement part, this circuit board, timer, and overlay offers seamless compatibility with various Samsung oven models. Its precision engineering ensures reliable performance, allowing you to effortlessly monitor and manage your cooking times and settings.
Whether you’re facing issues with responsiveness or visibility, this display is the perfect solution to restore efficiency in your kitchen. Installation is straightforward, promoting a hassle-free replacement process to get your oven back to optimal working condition. Choose this dependable part to maintain the quality and reliability you expect from Samsung appliances. Maintain your cooking experience today with this essential component.
Weight : 0.18 lbs
Package Dimension : 3.82 x 3.27 x 2.01
Compatible Brands

About this product
Maintain the functionality of your Samsung oven with this high-quality LED display component. Designed specifically as a replacement part, this circuit board, timer, and overlay offers seamless compatibility with various Samsung oven models. Its precision engineering ensures reliable performance, allowing you to effortlessly monitor and manage your cooking times and settings.
Whether you’re facing issues with responsiveness or visibility, this display is the perfect solution to restore efficiency in your kitchen. Installation is straightforward, promoting a hassle-free replacement process to get your oven back to optimal working condition. Choose this dependable part to maintain the quality and reliability you expect from Samsung appliances. Maintain your cooking experience today with this essential component.
Weight : 0.18 lbs
Package Dimension : 3.82 x 3.27 x 2.01
Replacing the DE07-00129A Samsung Oven LED display is relatively simple and can be done with minimal tools. This guide will provide detailed instructions for replacing your oven's display.
1. Unplug your oven from power source.
2. Remove the screws that hold the handle in place, as well as the screws located at the sides and bottom of the control panel. Pull gently to remove the control panel.
3. Remove the back cover from the display. There should be a few visible screws on the back side of the display. Take out these screws and then carefully pull apart the back cover with needle nose pliers.
4. Carefully remove the display cable by gently pulling it out.
5. Take out the old display by unscrewing any visible screws that are holding it in place.
6. Insert the new display and reconnect the display cable.
7. Put the back cover back on, making sure to tightly screw the screws back in.
8. Replace the control panel, making sure all screws are securely tightened.
9. Plug in your oven and test the new display.
If you followed these steps correctly, your new display should be up and running.
Please keep in mind, these instructions are for general guidance and should always be used in conjunction with the manufacturer's manual, if available.


