Online Sale!
100% Guaranteed Genuine Parts
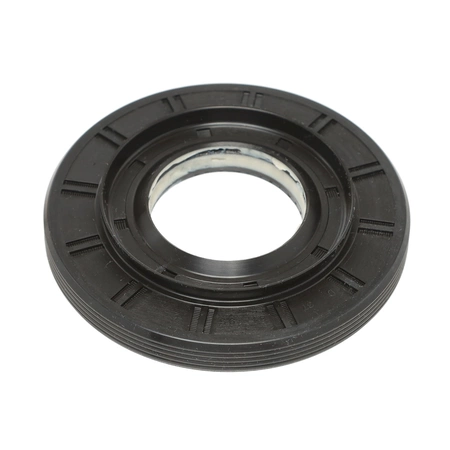
MDS62058301 LG Washer Rear Tub Gasket Seal
Ensure your LG washer operates smoothly with this high-quality rear tub gasket seal. Designed specifically for compatibility with LG Electronics appliances, this essential part helps prevent leaks and maintain optimal performance. Constructed from durable materials, the gasket and seal are built to withstand the rigors of frequent use, ensuring long-lasting reliability.
Replacing worn or damaged components is crucial for preventing water damage and enhancing the efficiency of your washing machine. This specific part, identified by the SKU MDS62058301, fits seamlessly into your appliance, making installation straightforward even for those with basic DIY skills. Trust in this genuine part to restore your washer's functionality and keep your laundry routine hassle-free. Experience peace of mind with a product engineered for excellence in your home.
Weight : 0.02 lbs
Package Dimension : 3.03 x 2.99 x 0.31
Compatible Brands


About this product
Ensure your LG washer operates smoothly with this high-quality rear tub gasket seal. Designed specifically for compatibility with LG Electronics appliances, this essential part helps prevent leaks and maintain optimal performance. Constructed from durable materials, the gasket and seal are built to withstand the rigors of frequent use, ensuring long-lasting reliability.
Replacing worn or damaged components is crucial for preventing water damage and enhancing the efficiency of your washing machine. This specific part, identified by the SKU MDS62058301, fits seamlessly into your appliance, making installation straightforward even for those with basic DIY skills. Trust in this genuine part to restore your washer's functionality and keep your laundry routine hassle-free. Experience peace of mind with a product engineered for excellence in your home.
Weight : 0.02 lbs
Package Dimension : 3.03 x 2.99 x 0.31
DIY Instructions for Replacing the MDS62058301 LG Washer Rear Tub Gasket/Rear Tub Seal Gasket
1. Turn off the washer’s power supply and unplug it from the wall.
2. Carefully lift the top panel of the washing machine to gain access to the rear tub gasket.
3. Use a flathead screwdriver to remove all the screws that are holding the gasket in place.
4. Pull the old gasket off and discard it.
5. Inspect the area around the old gasket for any damage or wear. If any is found, replace any necessary parts before continuing.
6. Place the new gasket over the rear tub of the washing machine and ensure it is aligned properly.
7. Secure the gasket with the screws you removed earlier, making sure to tighten them securely.
8. Replace the top panel of the machine.
9. Plug the washer back into its power source and turn it on.
10. Run a cycle and inspect the area around the gasket after it is complete, ensuring there is no water leakage and all connections are secure.
Please keep in mind, these instructions are for general guidance and should always be used in conjunction with the manufacturer's manual, if available.


