Online Sale!
100% Guaranteed Genuine Parts
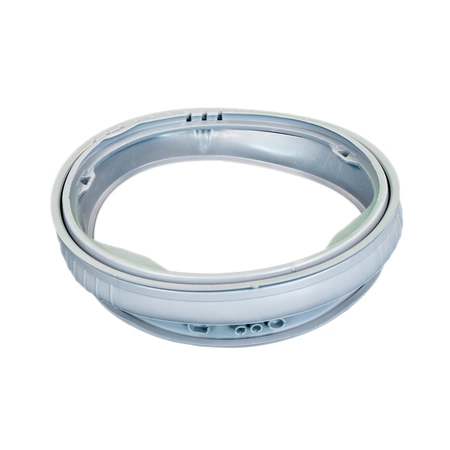
MDS47123604 LG Washer Door Boot Gasket Seal
Ensure optimal performance and longevity for your LG washing machine with this essential sealing component. Designed specifically for LG appliances, this durable gasket ensures a tight, leak-free fit, preventing water from escaping during cycles. Crafted from high-quality materials, it effectively withstands the wear and tear of everyday laundry tasks while maintaining a secure seal.
This replacement part is a perfect match for your LG washer, making installation quick and straightforward. By replacing a worn or damaged door boot gasket, you'll Maintain the efficiency of your appliance and safeguard against potential water damage. Invest in this crucial component to keep your laundry running smoothly, ensuring your clothes are always washed effectively and safely. Transform your laundry experience today with this reliable gasket and seal!
Weight : 17.84 lbs
Package Dimension : 19.92 x 18.94 x 6.57
Compatible Brands


About this product
Ensure optimal performance and longevity for your LG washing machine with this essential sealing component. Designed specifically for LG appliances, this durable gasket ensures a tight, leak-free fit, preventing water from escaping during cycles. Crafted from high-quality materials, it effectively withstands the wear and tear of everyday laundry tasks while maintaining a secure seal.
This replacement part is a perfect match for your LG washer, making installation quick and straightforward. By replacing a worn or damaged door boot gasket, you'll Maintain the efficiency of your appliance and safeguard against potential water damage. Invest in this crucial component to keep your laundry running smoothly, ensuring your clothes are always washed effectively and safely. Transform your laundry experience today with this reliable gasket and seal!
Weight : 17.84 lbs
Package Dimension : 19.92 x 18.94 x 6.57
The following parts are replaced by this product
- MDS47123606
No more associated models for this part.
Replacing the MDS47123604 LG Washer Door Boot Gasket Bellows Seal
If your washer door boot seal has become cracked or torn, it's time to replace it. This guide will walk you through the steps of replacing the MDS47123604 LG Washer Door Boot Gasket Bellows Seal.
Tools Needed:
#2 Phillips screwdriver
Needle-nose pliers
Step 1: Unplug the Washer
Before you begin any work on the washing machine, unplug the power cord from the wall outlet. This precaution helps prevent electric shock and damage to the appliance.
Step 2: Remove the Top Panel
Using a #2 Phillips screwdriver, remove the screws from the top panel of the washer. Carefully lift off the top panel and set aside.
Step 3: Locate the Door Boot Seal
Once the top panel is removed, you will see the door boot seal. It will be located at the bottom of the washer tub.
Step 4: Disconnect the Wiring Harness
Disconnect the wiring harness leading to the door boot seal. Use a pair of needle-nose pliers to disconnect the wiring harness from the door boot seal.
Step 5: Remove the Door Boot Seal
Remove the screws that attach the door boot seal to the washer tub. Carefully lift the door boot seal off of the washer tub.
Step 6: Install the New Door Boot Seal
Install the new door boot seal onto the washer tub. Secure the door boot seal with the screws that were removed in the previous step.
Step 7: Connect the Wiring Harness
Re-attach the wiring harness to the door boot seal. Make sure the connections are secure.
Step 8: Replace the Top Panel
Replace the top panel of the washer. Secure the top panel with the screws that were removed in step 2.
Your LG Washer Door Boot Gasket Bellows Seal is now replaced. Remember to plug the power cord back into the wall outlet when you're finished.
Please keep in mind, these instructions are for general guidance and should always be used in conjunction with the manufacturer's manual, if available.


