Online Sale!
100% Guaranteed Genuine Parts
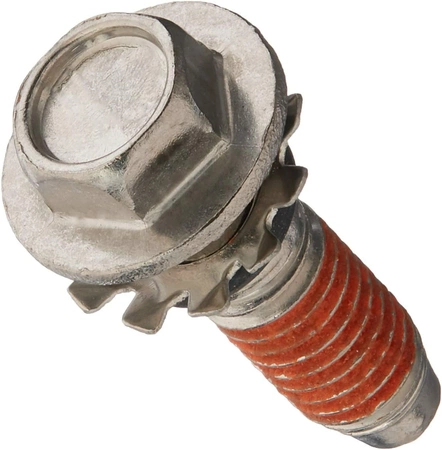
FAB30598601 LG Washer Custom Screw
Maintain the performance of your LG washer with this essential custom screw, specifically designed for seamless compatibility with various LG models. Crafted by LG Electronics, this fastener guarantees a perfect fit, ensuring that your appliance operates smoothly and efficiently. A reliable component, this screw is crucial for maintaining the structural integrity of your washer, allowing it to perform at its best.
Ideal for both repairs and replacements, this product is made from high-quality materials to withstand the rigors of everyday use. Whether you're a professional technician or a DIY enthusiast, having the right fastener can make all the difference in appliance upkeep. Trust in an original part for your LG appliances to ensure durability and lasting performance.
Weight : 0.06 lbs
Package Dimension : 5.24 x 1.81 x 0.83
Compatible Brands


About this product
Maintain the performance of your LG washer with this essential custom screw, specifically designed for seamless compatibility with various LG models. Crafted by LG Electronics, this fastener guarantees a perfect fit, ensuring that your appliance operates smoothly and efficiently. A reliable component, this screw is crucial for maintaining the structural integrity of your washer, allowing it to perform at its best.
Ideal for both repairs and replacements, this product is made from high-quality materials to withstand the rigors of everyday use. Whether you're a professional technician or a DIY enthusiast, having the right fastener can make all the difference in appliance upkeep. Trust in an original part for your LG appliances to ensure durability and lasting performance.
Weight : 0.06 lbs
Package Dimension : 5.24 x 1.81 x 0.83
DIY Repair Guide to Replacing a FAB30598601 LG Washer Customized Screw
Are you dealing with a faulty customized screw on your LG washer, model FAB30598601? Don't worry - you can replace the customized screw without any professional assistance. Here's how to get it done:
1. Gather your tools. You will need a Phillips head screwdriver, needle-nose pliers, and a replacement FAB30598601 customized screw.
2. Unplug your LG washer from the power supply. For added safety, flip the breaker switch controlling your washer’s power in the circuit panel to prevent electric shock.
3. Locate the customized screw that requires replacement. It will be in the back of the washer near the upper left corner.
4. Use the Phillips head screwdriver to remove the faulty screw. Have the needle-nose pliers nearby in case the screw needs to be pried out.
5. Insert the new customized screw into the same hole. Secure it with the Phillips head screwdriver.
6. Plug your LG washer back into the power supply. Turn the breaker switch back on.
7. Test the washer by running a cycle to make sure it works properly.
Congratulations - you have successfully replaced the faulty customized screw! Now you can enjoy the peace of mind of knowing your washer is operating smoothly again.
Please keep in mind, these instructions are for general guidance and should always be used in conjunction with the manufacturer's manual, if available.


Login and Registration Form