Online Sale!
100% Guaranteed Genuine Parts
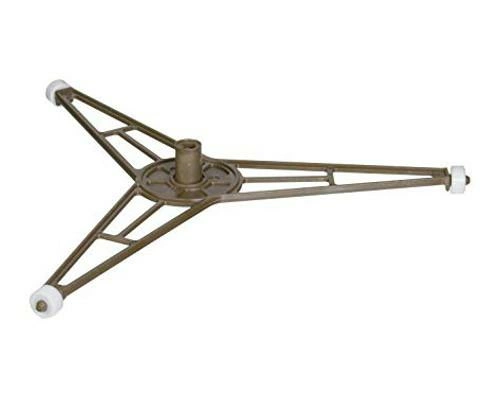
AJS73149201 LG Turntable Assembly
Turntable Assembly works with some LG models of Microwaves
Weight : 0.57 lbs
Package Dimension : 8.86 x 9.02 x 0.98
Compatible Brands


About this product
Turntable Assembly works with some LG models of Microwaves
Weight : 0.57 lbs
Package Dimension : 8.86 x 9.02 x 0.98
How to Replace the AJS73149201 LG Turntable Assembly
Replacing the AJS73149201 LG Turntable Assembly can be done with a few simple tools. This guide will provide instructions on how to successfully replace your turntable assembly.
Tools You’ll Need:
• Phillips head screwdriver
• Putty knife
• Torx driver
• New AJS73149201 LG Turntable Assembly
Step 1: Unplug Your Turntable
Before you start taking apart your turntable, it is important to unplug it from any power source first. This will prevent accidental electric shocks or damages to the unit.
Step 2: Remove the Turntable Cover
Using the Phillips head screwdriver, remove the screws from the sides and back of the turntable cover. Carefully pull off the cover and set it aside.
Step 3: Locate the Old Turntable Assembly
You should be able to easily locate the turntable assembly in the center of the unit. Take note of any other components that are associated with the assembly such as wires or connectors.
Step 4: Disconnect the Wires
Using the putty knife, gently disconnect all of the wires and/or connectors that are attached to the old turntable assembly.
Step 5: Remove the Screws
Using the Torx driver, remove the screws that are securing the old turntable assembly to the unit. Be sure to keep track of each screw and its respective location.
Step 6: Place the New Turntable Assembly
Carefully place the new turntable assembly in the same location as the old one. Secure it with the same screws that were used for the old assembly.
Step 7: Reconnect the Wires
Using the putty knife, carefully reconnect all of the wires and/or connectors that were disconnected from the old turntable assembly.
Step 8: Put on the Cover
Using the Phillips head screwdriver, reattach the turntable cover. Make sure the cover is securely in place.
Step 9: Test the New Turntable Assembly
Finally, plug the unit back in to check if the new turntable assembly has been successfully replaced. If the turntable functions normally, you have successfully replaced the AJS73149201 LG Turntable Assembly.
Please keep in mind, these instructions are for general guidance and should always be used in conjunction with the manufacturer's manual, if available.


