Online Sale!
100% Guaranteed Genuine Parts
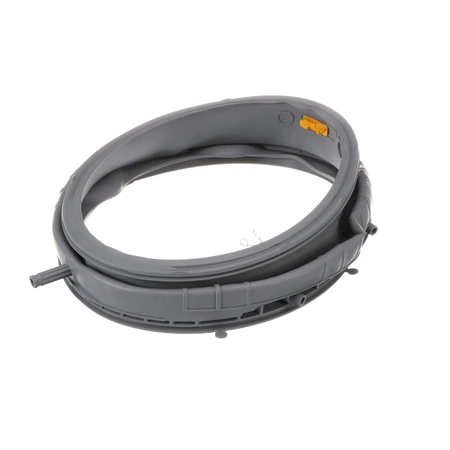
AGM30030702 LG Washer Turbo Gasket Door Boot
AGM30030702 is an original equipment manufactured (OEM) part. Ensure optimal performance and longevity for your washing machine with this high-quality door boot gasket. Manufactured by LG Electronics, this essential part is designed specifically for LG washers, maintaining a secure seal during operation. The AGM30030702 gasket prevents leaks, ensuring efficiency and protecting your appliance from potential damage. Constructed for durability, it fits seamlessly within your washer, making installation straightforward. Whether you're replacing a worn-out seal or conducting routine maintenance, this gasket is a vital component for ensuring your laundry experiences are smooth and trouble-free. Invest in this reliable part to keep your washer running at its best.
Weight : 32.63 lbs
Package Dimension : 27.99 x 22.24 x 7.28
Compatible Brands

About this product
AGM30030702 is an original equipment manufactured (OEM) part. Ensure optimal performance and longevity for your washing machine with this high-quality door boot gasket. Manufactured by LG Electronics, this essential part is designed specifically for LG washers, maintaining a secure seal during operation. The AGM30030702 gasket prevents leaks, ensuring efficiency and protecting your appliance from potential damage. Constructed for durability, it fits seamlessly within your washer, making installation straightforward. Whether you're replacing a worn-out seal or conducting routine maintenance, this gasket is a vital component for ensuring your laundry experiences are smooth and trouble-free. Invest in this reliable part to keep your washer running at its best.
Weight : 32.63 lbs
Package Dimension : 27.99 x 22.24 x 7.28
How to Replace the LG AGM30030702 VICTOR2 TN TURBO GASKET+RING
1. Shut off gas supply and close the shutoff valve. Make sure that the area around the appliance is free of any combustible materials. Make sure to wear gloves, eye protection and other protective gear.
2. Remove the screws or bolts that hold the burner assembly in place. Carefully lift the assembly out and set it aside.
3. Inspect the condition of the existing gasket and ring. If it is cracked or damaged, replace with a new one.
4. Place the new gasket around the edge of the burner assembly.
5. Secure the gasket to the burner assembly using bolts, screws or adhesive.
6. Place the ring over the edge of the gasket and secure it with screws or bolts.
7. Re-assemble the burner assembly, making sure everything is tightly secured.
8. Turn on the gas supply and open the shutoff valve.
9. Check for gas leaks.
10. Test the appliance to ensure it is functioning correctly.
Please keep in mind, these instructions are for general guidance and should always be used in conjunction with the manufacturer's manual, if available.


