Online Sale!
100% Guaranteed Genuine Parts
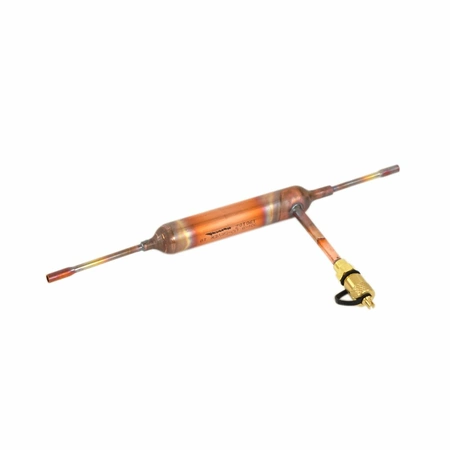
ADH73150210 LG Dryer Assembly
Maintain the efficiency of your LG refrigerator with this high-quality compressor and sealed system assembly. Designed specifically for compatibility with LG appliances, this dependable part ensures optimal cooling performance, helping to maintain the freshness of your food and beverages.
Constructed for durability, this assembly meets rigorous standards of quality and reliability, making it an essential component for your refrigerator's functionality. Whether you’re replacing an old compressor or performing routine maintenance, you can trust this part to restore your appliance to peak condition.
With a straightforward installation process, this compressor is perfect for both experienced users and DIY enthusiasts. Ensure your refrigerator runs smoothly and efficiently with this vital replacement part from LG Electronics.
Weight : 0.49 lbs
Package Dimension : 12.01 x 4.37 x 1.30
Compatible Brands


About this product
Maintain the efficiency of your LG refrigerator with this high-quality compressor and sealed system assembly. Designed specifically for compatibility with LG appliances, this dependable part ensures optimal cooling performance, helping to maintain the freshness of your food and beverages.
Constructed for durability, this assembly meets rigorous standards of quality and reliability, making it an essential component for your refrigerator's functionality. Whether you’re replacing an old compressor or performing routine maintenance, you can trust this part to restore your appliance to peak condition.
With a straightforward installation process, this compressor is perfect for both experienced users and DIY enthusiasts. Ensure your refrigerator runs smoothly and efficiently with this vital replacement part from LG Electronics.
Weight : 0.49 lbs
Package Dimension : 12.01 x 4.37 x 1.30
The following parts are replaced by this product
- 5851JA2008R
- ADH73150206
- ADH73150207
- 5851JA2008S
- 5851JA2007L
- ADH69749103
- 5851JA2008U
- 5851JA2008V
- 5851JA2007A
- 5851JA2007E
- ADH73590302
- ADH73590301
1. Turn off the power to your dryer and unplug it from its power source.
2. Remove the top panel of your dryer, then the front panel and door. You may need to unscrew and remove certain components to get to the dryer assembly.
3. Carefully disconnect all wiring connected to the LG ADH73150210 Dryer Assembly.
4. Unscrew the mounting screws and remove the assembly from the dryer.
5. Place the new LG ADH73150210 Dryer Assembly into position and reattach the mounting screws.
6. Reconnect all wires to the new dryer assembly, making sure that the connections are secure.
7. Replace the front panel and door and reattach the top panel.
8. Plug in your dryer and turn on the power.
9. Test the new dryer assembly to make sure it’s working properly.
Please keep in mind, these instructions are for general guidance and should always be used in conjunction with the manufacturer's manual, if available.


