Online Sale!
100% Guaranteed Genuine Parts
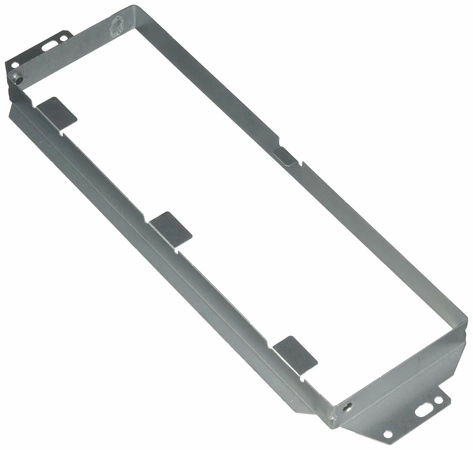
4810W1A151A LG Microwave Oven Idle Bracket
Maintain the performance of your LG microwave with this essential idle bracket, designed specifically for duct and venting applications. Crafted by LG Electronics, this durable part ensures proper alignment and support for optimal airflow, contributing to the efficiency and longevity of your appliance.
Compatible with various LG microwave models, this idle bracket is an ideal replacement component for maintenance and repair tasks. Its robust construction promises resilience against heat and wear, making it a reliable choice for any home chef.
Installing this part can help you maintain consistent cooking results and improve the overall functionality of your kitchen appliances. Invest in quality with this expertly designed accessory and keep your LG microwave operating at its best.
Weight : 0.16 lbs
Package Dimension : 11.35 x 3.50 x 0.80
Compatible Brands


About this product
Maintain the performance of your LG microwave with this essential idle bracket, designed specifically for duct and venting applications. Crafted by LG Electronics, this durable part ensures proper alignment and support for optimal airflow, contributing to the efficiency and longevity of your appliance.
Compatible with various LG microwave models, this idle bracket is an ideal replacement component for maintenance and repair tasks. Its robust construction promises resilience against heat and wear, making it a reliable choice for any home chef.
Installing this part can help you maintain consistent cooking results and improve the overall functionality of your kitchen appliances. Invest in quality with this expertly designed accessory and keep your LG microwave operating at its best.
Weight : 0.16 lbs
Package Dimension : 11.35 x 3.50 x 0.80
The following parts are replaced by this product
- 3B72144A
DIY Guide to Replacing the 4810W1A151A LG Microwave Oven Idle Bracket
Are you looking for a reliable way to change out the 4810W1A151A idle bracket on your LG Microwave Oven? If so, this DIY guide can help! This guide will provide you with step-by-step instructions on how to easily and safely replace your idle bracket in order to get your LG microwave oven running again.
What You’ll Need:
• #2 Phillips screwdriver
• Socket wrench set
• Replacement 4810W1A151A idle bracket
Step 1: Unplug your LG microwave oven from the power outlet and make sure that it is completely shut off.
Step 2: Remove the control panel cover by unscrewing the five screws using your Phillips screwdriver.
Step 3: Disconnect the power wire harness located at the back of the control panel and remove the panel entirely.
Step 4: Locate the 4 screws that secure the plate containing the idle bracket to the microwave body. Use your socket wrench to remove them.
Step 5: Pull the plate out of the body, being careful not to disturb the other components inside.
Step 6: Unscrew the single screw that holds the idle bracket onto the plate and remove the old bracket.
Step 7: Slide the new idle bracket into position and secure it to the plate using the screw.
Step 8: Replace the entire plate into the microwave body, making sure to properly align it with the rest of the components.
Step 9: Finally, secure the plate using your socket wrench and hand tighten the screws.
Step 10: Reconnect the power wire harness, replace the control panel cover, and tighten the screws with your Phillips screwdriver.
Step 11: Plug in the microwave oven and test to make sure the new idle bracket functions properly.
Congratulations, you have successfully replaced the 4810W1A151A idle bracket on your LG microwave oven! We hope this DIY guide has been helpful and informative.
Please keep in mind, these instructions are for general guidance and should always be used in conjunction with the manufacturer's manual, if available.


