Online Sale!
100% Guaranteed Genuine Parts
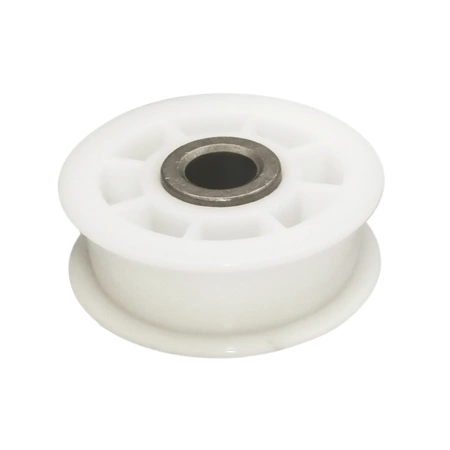
4560EL3001A LG Dryer Idler Pulley Wheel
4560EL3001A is an original equipment manufactured (OEM) part. Ensure your LG dryer operates at peak efficiency with the premium Idler Pulley Wheel. This essential component, designed specifically for LG appliances, helps stabilize the dryer belt, promoting smoother operation and reducing noise during cycles. An effective replacement for worn or damaged pulleys, it aids in maintaining the proper tension for optimal drying performance. Crafted from durable materials, this part guarantees longevity and reliability, making it a vital addition to your dryer maintenance. Compatible with various LG dryer models, this idler pulley is easy to install, allowing you to quickly restore your appliance to its best working condition. Invest in quality and keep your laundry routine running smoothly with this dependable dryer part.
Weight : 0.02 lbs
Package Dimension : 3.50 x 3.11 x 1.73
Compatible Brands


About this product
4560EL3001A is an original equipment manufactured (OEM) part. Ensure your LG dryer operates at peak efficiency with the premium Idler Pulley Wheel. This essential component, designed specifically for LG appliances, helps stabilize the dryer belt, promoting smoother operation and reducing noise during cycles. An effective replacement for worn or damaged pulleys, it aids in maintaining the proper tension for optimal drying performance. Crafted from durable materials, this part guarantees longevity and reliability, making it a vital addition to your dryer maintenance. Compatible with various LG dryer models, this idler pulley is easy to install, allowing you to quickly restore your appliance to its best working condition. Invest in quality and keep your laundry routine running smoothly with this dependable dryer part.
Weight : 0.02 lbs
Package Dimension : 3.50 x 3.11 x 1.73
Step 1: Disconnect from Power Source
Before beginning any repair work to a dryer, it is important to disconnect the power source for safety. Locate the power cord and unplug it from the wall outlet.
Step 2: Remove Back Panel
Using a Phillips screwdriver, remove the screws at the back of the dryer to access the inside of the unit.
Step 3: Cut Belt
Once the back panel is removed, you can access the belt located around the drum. Use a utility knife to cut the belt in order to remove it from the motor and idler pulley.
Step 4: Remove Idler Pulley Wheel
Once the belt has been removed, you will be able to access the idler pulley wheel. Use a pair of pliers to remove the mounting bolt that holds the pulley in place. Once the bolt is removed, the pulley should come off easily.
Step 5: Replace Idler Pulley Wheel
Insert the new idler pulley wheel and secure it in place with the mounting bolt. Make sure that the wheel is aligned properly and that it turns freely.
Step 6: Reattach Belt
Reattach the belt around the motor and idler pulley wheel. Make sure that it is in the correct position and is not twisted.
Step 7: Reassemble the Dryer
Replace the back panel of the dryer and use the Phillips screwdriver to secure the panel in place.
Step 8: Reconnect Power Source
Reconnect the power source to the dryer and test the appliance to make sure that it is working correctly.
Please keep in mind, these instructions are for general guidance and should always be used in conjunction with the manufacturer's manual, if available.


