Online Sale!
100% Guaranteed Genuine Parts
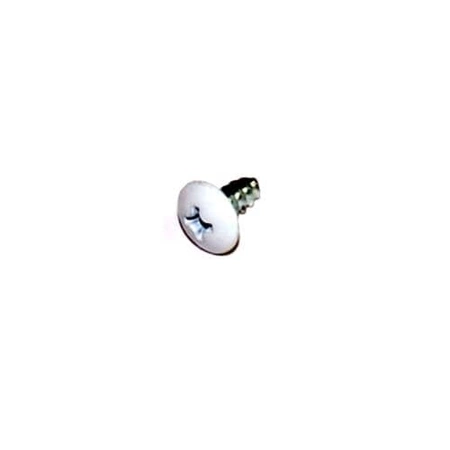
1SZZJA3011B LG Refrigerator Customized Drawing Screw
Maintain the functionality of your LG refrigerator with this high-quality customized drawing screw. Designed specifically for LG appliances, this durable fastener ensures a secure fit, making it an essential component for maintaining optimal performance. Crafted to meet precise specifications, it guarantees compatibility with a range of LG refrigerator models. This part is ideal for both repairs and replacements, providing a reliable solution to keep your fridge in top condition. Whether you're a DIY enthusiast or a professional technician, this fastener simplifies your repair tasks. Trust in the quality of LG Electronics to support your appliance needs seamlessly. Secure your refrigerator’s operation today with this vital component.
Weight : 0.00 lbs
Package Dimension : 0.30 x 0.30 x 0.40
Compatible Brands


About this product
Maintain the functionality of your LG refrigerator with this high-quality customized drawing screw. Designed specifically for LG appliances, this durable fastener ensures a secure fit, making it an essential component for maintaining optimal performance. Crafted to meet precise specifications, it guarantees compatibility with a range of LG refrigerator models. This part is ideal for both repairs and replacements, providing a reliable solution to keep your fridge in top condition. Whether you're a DIY enthusiast or a professional technician, this fastener simplifies your repair tasks. Trust in the quality of LG Electronics to support your appliance needs seamlessly. Secure your refrigerator’s operation today with this vital component.
Weight : 0.00 lbs
Package Dimension : 0.30 x 0.30 x 0.40
No more associated models for this part.
DIY Refrigerator Breakdown: Replacing the 1SZZJA3011B LG Refrigerator Customized Drawing Screw
Are you in need of a replacement customized drawing screw for your LG refrigerator? Don't despair! Replacing this screw is a relatively straightforward process that only requires basic tools. Follow our easy step-by-step instructions to quickly and properly replace the 1SZZJA3011B LG Refrigerator Customized Drawing Screw.
Step 1: Safety First
Turn off the refrigerator's power supply before beginning the repair process. This should also include disconnecting the water line if applicable.
Step 2: Gather Your Tools
You will need a Phillips head screwdriver, an adjustable wrench, and a pair of safety glasses. If you do not have safety glasses, then make sure to wear goggles or eye protection during the repair process.
Step 3: Locate the Screw
Remove the appliance’s back panel to locate the customized drawing screw. Depending on the make and model of the refrigerator, this may be located on either the top or bottom of the unit.
Step 4: Remove the Old Screw
Use the Phillips head screwdriver to loosen and remove the old screw from its post. Once this has been accomplished, use an adjustable wrench to ensure the screw has been completely removed.
Step 5: Put in the New Screw
Place the new screw into the post and secure it with the adjustable wrench. Make sure it is tight and securely fastened in place.
Step 6: Reattach the Panel
Replace the appliance’s back panel and give the screw one final tightening with the adjustable wrench.
Your LG refrigerator is now ready to use! Replacing the 1SZZJA3011B LG Refrigerator customized drawing screw is a simple process that can be completed in just a few easy steps. Remember to always be cautious and take any necessary safety precautions when performing DIY repair jobs. With these instructions, you are now well on your way to keeping your appliances in tip-top shape!
Please keep in mind, these instructions are for general guidance and should always be used in conjunction with the manufacturer's manual, if available.


