Online Sale!
100% Guaranteed Genuine Parts
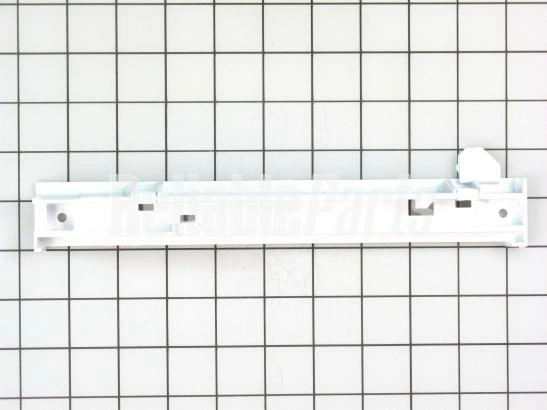
WR72X241 GE Refrigerator Left Hand Crisper Drawer Slide Rail
Maintain the functionality of your refrigerator with this high-quality left-hand crisper drawer slide rail. Designed specifically for select GE models, this durable part ensures smooth operation of your crisper drawer, optimizing your storage space for fresh produce and other items. This slide rail is not just compatible with GE refrigerators; it also fits Hotpoint, Haier, Monogram, and Café models, making it a versatile choice for multiple brands. Easy to install, the WR72X241 part is essential for maintaining the efficiency and usability of your refrigerator. Replace worn or damaged slide rails to guarantee that your crisper drawer functions without hiccups, ensuring your groceries stay organized and easily accessible. Keep your appliance running smoothly with this reliable refrigerator part.
Weight : 0.86 lbs
Package Dimension : 17.00 x 7.00 x 1.00
Compatible Brands


About this product
Maintain the functionality of your refrigerator with this high-quality left-hand crisper drawer slide rail. Designed specifically for select GE models, this durable part ensures smooth operation of your crisper drawer, optimizing your storage space for fresh produce and other items. This slide rail is not just compatible with GE refrigerators; it also fits Hotpoint, Haier, Monogram, and Café models, making it a versatile choice for multiple brands. Easy to install, the WR72X241 part is essential for maintaining the efficiency and usability of your refrigerator. Replace worn or damaged slide rails to guarantee that your crisper drawer functions without hiccups, ensuring your groceries stay organized and easily accessible. Keep your appliance running smoothly with this reliable refrigerator part.
Weight : 0.86 lbs
Package Dimension : 17.00 x 7.00 x 1.00
The following parts are replaced by this product
- WR72X0241
DIY Guide to Replacing the Left Hand Slide Rail Assembly on the WR72X241 GE Refrigerator
To replace the left-hand slide rail assembly on a WR72X241 GE refrigerator, you will first need to gather the following supplies:
- Phillips Head Screwdriver
- Flathead Screwdriver
- New Slide Rail Assembly
Now you're ready to complete the following steps:
1. Start by unplugging your GE refrigerator from the electrical outlet.
2. Using a Phillips head screwdriver, remove the screws on the bottom of the crisper drawer frame.
3. Carefully remove the frame and slide out the entire slide rail assembly.
4. Now unsnap and detach the old left-hand slide rail assembly from the frame.
5. Take the new slide rail assembly and attach it firmly to the frame.
6. Insert the slide rail assembly back into the frame and use a flathead screwdriver to lock it into position.
7. Replace the screws on the frame and then plug the refrigerator back into the electrical outlet.
You have now successfully replaced the left-hand slide rail assembly on your WR72X241 GE Refrigerator.
Please keep in mind, these instructions are for general guidance and should always be used in conjunction with the manufacturer's manual, if available.
Please Verify Your Purchase to Submit a Review
Please note: We use this information only to confirm your purchase, it won’t be published.


