Online Sale!
100% Guaranteed Genuine Parts
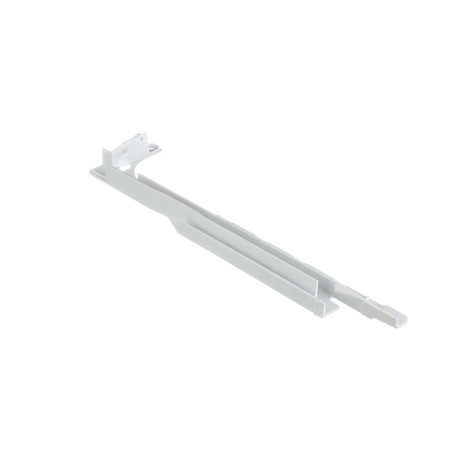
WR72X10233 GE Refrigerator Drawer Glide
WR72X10233 is an original equipment manufactured (OEM) part. Maintain your refrigerator's functionality with this high-quality drawer glide, designed specifically for various GE models and compatible brands, including Hotpoint, Haier, Monogram, and Café. This essential part, identified by SKU WR72X10233, ensures smooth operation of refrigerator drawers, enhancing organization and accessibility for your food items. Made from durable materials, this glide provides long-lasting performance, helping to maintain the efficiency of your refrigerator.
Installation is straightforward, making it easy to restore your appliance to optimal working condition without the need for professional assistance. Whether you're replacing a worn-out part or performing routine maintenance, this drawer glide is an indispensable component for keeping your refrigerator in top shape. Ensure your kitchen stays functional and efficient with this reliable refrigerator accessory.
Weight : 1.33 lbs
Package Dimension : 19.21 x 7.64 x 1.26
Compatible Brands


About this product
WR72X10233 is an original equipment manufactured (OEM) part. Maintain your refrigerator's functionality with this high-quality drawer glide, designed specifically for various GE models and compatible brands, including Hotpoint, Haier, Monogram, and Café. This essential part, identified by SKU WR72X10233, ensures smooth operation of refrigerator drawers, enhancing organization and accessibility for your food items. Made from durable materials, this glide provides long-lasting performance, helping to maintain the efficiency of your refrigerator.
Installation is straightforward, making it easy to restore your appliance to optimal working condition without the need for professional assistance. Whether you're replacing a worn-out part or performing routine maintenance, this drawer glide is an indispensable component for keeping your refrigerator in top shape. Ensure your kitchen stays functional and efficient with this reliable refrigerator accessory.
Weight : 1.33 lbs
Package Dimension : 19.21 x 7.64 x 1.26
DIY: Replacing the GE WR72X10233 Glide Bucket LH Disp Drawer
Replacing the drawer glide on your GE WR72X10233 refrigerator can help ensure that it opens and closes smoothly. The procedure is simple and straightforward, but should be done with caution. This guide covers the steps to replace the glide bucket left hand dispenser drawer on the GE WR72X10233 refrigerator.
Tools and Materials Needed:
-Flat head screwdriver
-Phillips head screwdriver
-WR72X10233 glide bucket left hand dispenser drawer
Step 1: Unplug your fridge from the power source.
Step 2: Remove the upper crisper drawer by pulling it straight out.
Step 3: Remove the screws securing the drawer guide to the refrigerator frame. Use a Phillips head screwdriver to do this.
Step 4: Lift the drawer off of its tracks.
Step 5: Slide the new WR72X10233 glide bucket left-hand dispenser drawer into place.
Step 6: Secure the new drawer guide with the screws you just removed. Use a Phillips head screwdriver to do this.
Step 7: Replace the upper crisper drawer, and make sure it slides smoothly.
Step 8: Plug your fridge back in to the power source and test the drawer.
Congratulations- you have successfully replaced the glide bucket left-hand dispenser drawer on your GE WR72X10233 refrigerator! By following these simple steps, you can ensure that your refrigerator functions properly.
Please keep in mind, these instructions are for general guidance and should always be used in conjunction with the manufacturer's manual, if available.


