Online Sale!
100% Guaranteed Genuine Parts
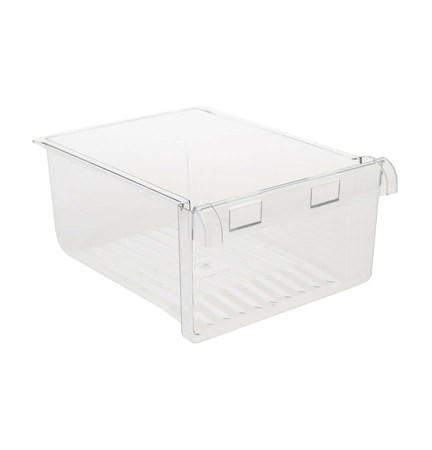
WR32X10479 GE Refrigerator Vegetable Humidity Pan
Maintain the performance of your refrigerator with this humidity pan, designed to keep your fruits and vegetables fresh longer. Crafted by GE, this high-quality replacement part (SKU: WR32X10479) is compatible with various brands, including Hotpoint, Haier, Monogram, and Café, ensuring a perfect fit for your appliance.
Constructed to regulate moisture levels, it creates an ideal environment for preserving the freshness of your produce. This durable drawer and pan assembly is easy to install, providing a seamless solution to restore your refrigerator’s functionality. Maintain your kitchen’s efficiency and maintain the quality of your food with this essential refrigerator part. Ideal for anyone looking to breathe new life into their GE appliance, this humidity pan will meet your preservation needs effortlessly.
Weight : 14.51 lbs
Package Dimension : 15.20 x 12.40 x 10.70
Compatible Brands


About this product
Maintain the performance of your refrigerator with this humidity pan, designed to keep your fruits and vegetables fresh longer. Crafted by GE, this high-quality replacement part (SKU: WR32X10479) is compatible with various brands, including Hotpoint, Haier, Monogram, and Café, ensuring a perfect fit for your appliance.
Constructed to regulate moisture levels, it creates an ideal environment for preserving the freshness of your produce. This durable drawer and pan assembly is easy to install, providing a seamless solution to restore your refrigerator’s functionality. Maintain your kitchen’s efficiency and maintain the quality of your food with this essential refrigerator part. Ideal for anyone looking to breathe new life into their GE appliance, this humidity pan will meet your preservation needs effortlessly.
Weight : 14.51 lbs
Package Dimension : 15.20 x 12.40 x 10.70
DIY Guide to Replacing GE Refrigerator Pan Veg Humidity WR32X10479
Replacing the veg humidity pan on your GE refrigerator is an easy DIY job that requires just a few simple steps. Here’s what you’ll need:
1. A replacement veg humidity pan—the WR32X10479
2. Flathead and Philips head screwdrivers
3. Pliers
Instructions
1. Unplug the fridge and locate the veg pan. The veg pan is located in the bottom right corner of your refrigerator, near the back.
2. Remove the screws holding the veg pan in place with a flathead or Philips head screwdriver, depending on the type of screws you have. You may need a pair of pliers to turn the screwdriver if it is too tight.
3. Pull the pan out, being careful not to damage the surrounding components.
4. Insert the new veg pan in its place and secure it with the screws. Make sure the pan is properly aligned, as this will ensure that the humidity inside the pan is regulated.
5. Plug in your fridge and you’re all set!
With just a few simple steps, you can easily replace the veg pan on your GE refrigerator. Enjoy your newly humidity-controlled veggies!
Please keep in mind, these instructions are for general guidance and should always be used in conjunction with the manufacturer's manual, if available.


Login and Registration Form