Online Sale!
100% Guaranteed Genuine Parts
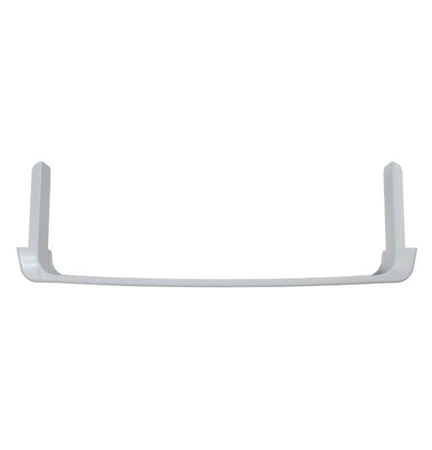
WR17X11889 GE Refrigerator Door Shelf Trim
Maintain the functionality of your refrigerator with this high-quality door shelf trim, designed specifically for a range of trusted brands including GE, Hotpoint, Haier, Monogram, and Café. This durable part ensures your refrigerator maintains its sleek appearance while providing reliable support for your shelves. Ideal for those looking to replace worn or damaged components, it seamlessly integrates with your appliance, making installation straightforward and efficient. Crafted to meet rigorous standards, this shelf trim is an essential accessory for maintaining organization and maximizing storage in your refrigerator. Invest in the longevity of your appliance with this essential part, specifically tailored for optimal performance across compatible models.
Weight : 9.97 lbs
Package Dimension : 31.54 x 10.24 x 4.29
Compatible Brands


About this product
Maintain the functionality of your refrigerator with this high-quality door shelf trim, designed specifically for a range of trusted brands including GE, Hotpoint, Haier, Monogram, and Café. This durable part ensures your refrigerator maintains its sleek appearance while providing reliable support for your shelves. Ideal for those looking to replace worn or damaged components, it seamlessly integrates with your appliance, making installation straightforward and efficient. Crafted to meet rigorous standards, this shelf trim is an essential accessory for maintaining organization and maximizing storage in your refrigerator. Invest in the longevity of your appliance with this essential part, specifically tailored for optimal performance across compatible models.
Weight : 9.97 lbs
Package Dimension : 31.54 x 10.24 x 4.29
DIY: How to Replace a GE WR17X11889 Door Shelf Trim
Replacing the door shelf trim of your General Electric (GE) refrigerator is a simple process, but it's important to be careful in order to avoid damaging the fridge. Follow this step-by-step guide to quickly and safely replace the GE WR17X11889 door shelf trim.
Step 1: Preparation - Unplug the fridge from its power source, then grab a flathead screwdriver, a putty knife, and your replacement GE WR17X11889 door shelf trim.
Step 2: Remove Trim Piece - Use your flathead screwdriver to remove the two screws at the top and bottom of the trim piece. Carefully slide the trim piece towards you until it comes off.
Step 3: Install New Trim Piece - Position the new trim piece on the refrigerator's door, ensuring that the notches are aligned with the holes in the door. Secure the trim piece by tightening the two screws at the top and bottom.
Step 4: Reattach Glides - Use a putty knife to pry open the glides that secure the shelves. Slip the glides into the slots on the side of the trim piece, then push them down to snap them into place.
Step 5: Use Refrigerator - Once the trim piece has been successfully installed, plug the refrigerator back in and use it as normal.
Please keep in mind, these instructions are for general guidance and should always be used in conjunction with the manufacturer's manual, if available.


