Online Sale!
100% Guaranteed Genuine Parts
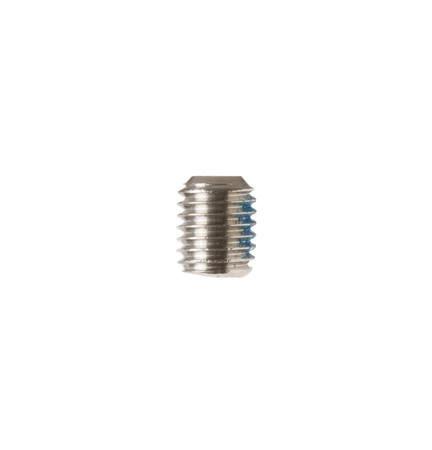
WR01X11014 GE Refrigerator Set Screw
WR01X11014 is an original equipment manufactured (OEM) part. Ensure the optimal performance of your refrigerator with this essential fastener. Designed specifically for compatibility with GE, Hotpoint, Haier, Monogram, and Café appliances, it guarantees a reliable fit for your unit. This set screw is a vital component that secures various internal parts of your refrigerator, ensuring they remain firmly in place during operation. Crafted with durability in mind, it helps maintain the integrity of your appliance, minimizing the risk of malfunctions. Whether you’re a professional technician or a DIY enthusiast, this part is easy to install and is a smart addition to your repair toolkit. Maintain your refrigerator’s reliability with this quality fastener today.
Weight : 0.01 lbs
Package Dimension : 3.11 x 0.75 x 0.35
Compatible Brands


About this product
WR01X11014 is an original equipment manufactured (OEM) part. Ensure the optimal performance of your refrigerator with this essential fastener. Designed specifically for compatibility with GE, Hotpoint, Haier, Monogram, and Café appliances, it guarantees a reliable fit for your unit. This set screw is a vital component that secures various internal parts of your refrigerator, ensuring they remain firmly in place during operation. Crafted with durability in mind, it helps maintain the integrity of your appliance, minimizing the risk of malfunctions. Whether you’re a professional technician or a DIY enthusiast, this part is easy to install and is a smart addition to your repair toolkit. Maintain your refrigerator’s reliability with this quality fastener today.
Weight : 0.01 lbs
Package Dimension : 3.11 x 0.75 x 0.35
Replacing the WR01X11014 GE Screw Set is a straightforward DIY project that can be done in minutes with the right tools and instructions. This guide will provide step-by-step instructions on how to properly replace the WR01X11014 GE Screw Set.
Tools Needed
Before you begin, make sure you have the following tools and supplies:
• Phillips head screwdriver
• WR01X11014 GE Screw Set
Instructions
1. Unplug the appliance. Make sure you unplug it from a power source before you begin.
2. Remove the cover or access panel of the appliance. Depending on the model, this may involve loosening some screws.
3. Locate the old screw set. Carefully remove it from the appliance.
4. Replace with the new WR01X11014 GE Screw Set. Line up the holes as necessary and insert the screws firmly.
5. Tighten the screws until they are secure. Use caution and do not over-tighten them.
6. Replace the cover or access panel on the appliance. Secure the screws before plugging the appliance back in.
7. Test the appliance and ensure the new screw set is properly installed and functioning.
Please keep in mind, these instructions are for general guidance and should always be used in conjunction with the manufacturer's manual, if available.


