Online Sale!
100% Guaranteed Genuine Parts
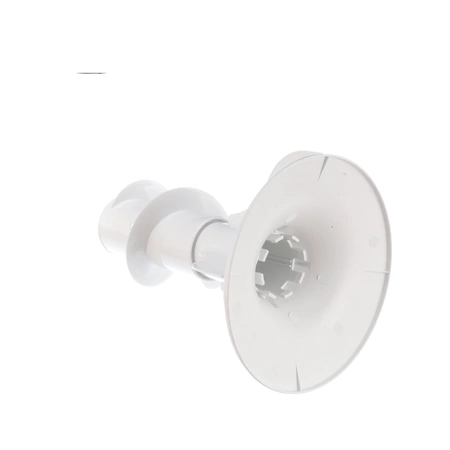
WH43X10034 GE Washer Agitator Assembly
WH43X10034 is an original equipment manufactured (OEM) part. Maintain your washing machine’s performance with this reliable agitator assembly from GE. Designed for compatibility with GE, Hotpoint, Haier, Monogram, and Café washers, this part ensures an efficient and thorough cleaning experience for your laundry. Crafted with durability in mind, the agitator is engineered to withstand regular use, promoting long-lasting reliability in your appliance.
Simple to install, it optimizes the washing cycle by effectively moving your clothes through water and detergent, ensuring a consistent wash every time. Ideal for those seeking to restore their washer’s functionality, this genuine GE part is the perfect solution to enhance your laundry routine. Don’t let a worn agitator slow you down—replace it today for cleaner, fresher results.
Weight : 28.49 lbs
Package Dimension : 17.60 x 15.10 x 14.90
Compatible Brands


About this product
WH43X10034 is an original equipment manufactured (OEM) part. Maintain your washing machine’s performance with this reliable agitator assembly from GE. Designed for compatibility with GE, Hotpoint, Haier, Monogram, and Café washers, this part ensures an efficient and thorough cleaning experience for your laundry. Crafted with durability in mind, the agitator is engineered to withstand regular use, promoting long-lasting reliability in your appliance.
Simple to install, it optimizes the washing cycle by effectively moving your clothes through water and detergent, ensuring a consistent wash every time. Ideal for those seeking to restore their washer’s functionality, this genuine GE part is the perfect solution to enhance your laundry routine. Don’t let a worn agitator slow you down—replace it today for cleaner, fresher results.
Weight : 28.49 lbs
Package Dimension : 17.60 x 15.10 x 14.90
The following parts are replaced by this product
- WH43X142
- WH43X10008
- WH43X0142
- WH43X0138
- WH43X25442
How to Replace the WH43X10034 GE Washer Agitator Assembly
Replacing the agitator assembly of your GE washing machine can seem like a daunting task. However, with the proper tools and a few simple steps, you can replace your WH43X10034 GE Washer Agitator Assembly in no time at all. Here's what you'll need:
• New WH43X10034 GE Washer Agitator Assembly
• Phillips-head screwdriver
• Flathead screwdriver
• Pliers
Step 1: Unplug the washer from the wall outlet and move it away from walls and other obstacles for easier access.
Step 2: Use the Phillips-head screwdriver to unscrew the screws on the back of the washer and remove the back panel.
Step 3: Find the agitator assembly located in the center of the tub. You will see a plastic retainer cap at the top of the agitator that is held in place by two screws. Remove these two screws with the Phillips-head screwdriver.
Step 4: Use the flathead screwdriver to pry the retainer cap off and then remove the locking ring underneath it. Once the lock ring is removed, the entire agitator can be pulled out of the tub.
Step 5: Take the new agitator assembly and slide it into the tub. Make sure the splines on the bottom of the agitator line up with the ones in the tub, then push it down firmly.
Step 6: Carefully replace the locking ring and the retainer cap, making sure they're securely in place. Then, use the Phillips-head screwdriver to secure them with the two screws.
Step 7: Put the back panel back in place and secure it with the screws you removed earlier.
Step 8: Plug in the washer and you're done!
Please keep in mind, these instructions are for general guidance and should always be used in conjunction with the manufacturer's manual, if available.


