Online Sale!
100% Guaranteed Genuine Parts
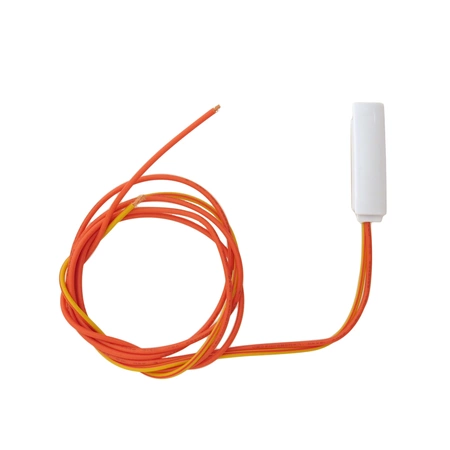
WH12X10334 GE Washer Lid Switch Assembly
WH12X10334 is an original equipment manufactured (OEM) part. Ensure your washing machine operates smoothly with this reliable lid switch assembly designed specifically for GE appliances and compatible with Hotpoint, Haier, Monogram, and Café brands. This essential component, known for its durability and efficiency, seamlessly integrates into your washer, ensuring it functions safely during operation. If you're experiencing issues with your washer not starting or running intermittently, this part is a vital replacement that can restore normalcy. Installation is straightforward, making it a great choice for DIYers and professionals alike. Count on this high-quality switch to enhance the performance of your washing machine and extend its lifespan. Keep your laundry routine undisturbed with a dependable solution.
Weight : 0.50 lbs
Package Dimension : 6.10 x 6.10 x 1.85
Compatible Brands


About this product
WH12X10334 is an original equipment manufactured (OEM) part. Ensure your washing machine operates smoothly with this reliable lid switch assembly designed specifically for GE appliances and compatible with Hotpoint, Haier, Monogram, and Café brands. This essential component, known for its durability and efficiency, seamlessly integrates into your washer, ensuring it functions safely during operation. If you're experiencing issues with your washer not starting or running intermittently, this part is a vital replacement that can restore normalcy. Installation is straightforward, making it a great choice for DIYers and professionals alike. Count on this high-quality switch to enhance the performance of your washing machine and extend its lifespan. Keep your laundry routine undisturbed with a dependable solution.
Weight : 0.50 lbs
Package Dimension : 6.10 x 6.10 x 1.85
Replacing the WH12X10334 GE Lid Switch Assembly
1. Unplug the appliance from the wall outlet. Move it away from the wall so you can access the rear part of the appliance.
2. Using a Phillips-head screwdriver, remove the screws that hold the control panel onto the back of the appliance.
3. Lift the control panel up and off the appliance, and locate the lid switch assembly on the left side of the opening.
4. Disconnect the two wires from the old lid switch assembly by squeezing the clips and pulling the wires out.
5. Remove the two screws that are securing the old lid switch assembly to the machine.
6. Pull the old lid switch assembly out of the opening.
7. Insert the new lid switch assembly into the opening, carefully lining up the holes on the assembly with the holes in the machine.
8. Secure the assembly with the two screws.
9. Attach the two wires to the new lid switch assembly by squeezing the clips and pushing the wires in.
10. Place the control panel back over the machine and secure it with the screws.
11. Plug the appliance back in and test the new lid switch assembly.
Please keep in mind, these instructions are for general guidance and should always be used in conjunction with the manufacturer's manual, if available.


