Online Sale!
100% Guaranteed Genuine Parts
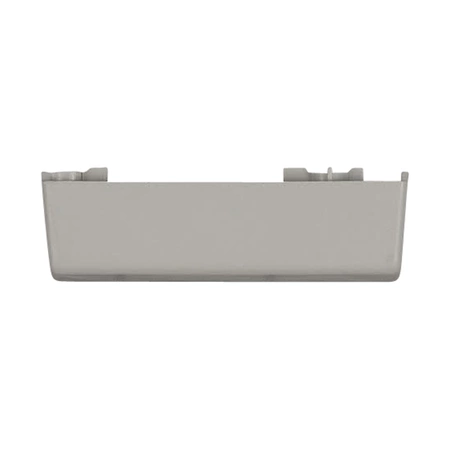
WH12X10276 GE Washer Door Magnet
WH12X10276 is an original equipment manufactured (OEM) part. Ensure your laundry routine runs smoothly with this reliable washer door magnet designed specifically for GE appliances. Engineered for compatibility with brands such as Hotpoint, Haier, Monogram, and Café, this essential part guarantees a secure door closure, preventing leaks and enhancing performance during wash cycles. Crafted for durability, its robust construction resists wear and tear over time, making it a smart replacement for your appliance. Easy to install, this door magnet helps maintain the integrity of your washer, ensuring effective operation and peace of mind. Don’t compromise on laundry quality—Maintain your washer with this essential part and experience optimal performance day after day.
Weight : 0.13 lbs
Package Dimension : 6.00 x 6.00 x 0.50
Compatible Brands


About this product
WH12X10276 is an original equipment manufactured (OEM) part. Ensure your laundry routine runs smoothly with this reliable washer door magnet designed specifically for GE appliances. Engineered for compatibility with brands such as Hotpoint, Haier, Monogram, and Café, this essential part guarantees a secure door closure, preventing leaks and enhancing performance during wash cycles. Crafted for durability, its robust construction resists wear and tear over time, making it a smart replacement for your appliance. Easy to install, this door magnet helps maintain the integrity of your washer, ensuring effective operation and peace of mind. Don’t compromise on laundry quality—Maintain your washer with this essential part and experience optimal performance day after day.
Weight : 0.13 lbs
Package Dimension : 6.00 x 6.00 x 0.50
The following parts are replaced by this product
- WH12X10092
DIY Step-by-Step Guide to Replacing the GE WH12X10276 Magnet Assembly D04
1. Turn off your washer and begin by unplugging it from the wall outlet.
2. Lift the washer lid and locate the magnet assembly D04. It should be located on the bottom of the drum.
3. Disconnect the wiring harness from the magnet assembly.
4. Remove the two screws that hold the magnet assembly in place.
5. Carefully lift the magnet assembly out of the washer, being careful to not damage any wires or parts near the assembly.
6. Place the new magnet assembly into the washer, being sure to align the screws with the holes in the washer.
7. Secure the magnet assembly in place via the two screws you removed earlier.
8. Reconnect the wiring harness to the new magnet assembly.
9. Close the lid of the washer and plug the washer back into the wall outlet.
10. Finally, turn on the washer to ensure that the magnet assembly is working properly.
Please keep in mind, these instructions are for general guidance and should always be used in conjunction with the manufacturer's manual, if available.


Login and Registration Form