Online Sale!
100% Guaranteed Genuine Parts
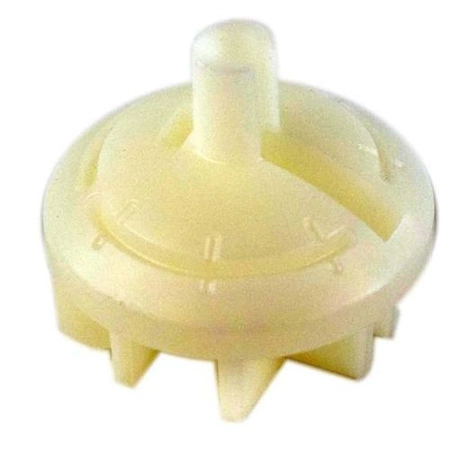
WH01X26970 GE Suspension Rod Support
Maintain the performance of your washing machine with this essential suspension rod support. Designed specifically for select GE appliances, this durable part ensures optimal shock absorption and stability during operation. Compatible with GE, Hotpoint, Haier, Monogram, and Café models, it seamlessly integrates to maintain your washer's efficiency and longevity.
Constructed from quality materials, this component helps reduce vibrations and noise, creating a quieter laundry experience. When installed, it improves drum balance, allowing you to tackle heavy loads without worrying about wear and tear. Easy to replace, it’s an ideal solution for restoring your washer's functionality and enhancing overall wash performance. Invest in this reliable suspension rod support to ensure your appliance continues to deliver exceptional results load after load.
Weight : 0.60 lbs
Package Dimension : 8.00 x 7.50 x 1.40
Compatible Brands


About this product
Maintain the performance of your washing machine with this essential suspension rod support. Designed specifically for select GE appliances, this durable part ensures optimal shock absorption and stability during operation. Compatible with GE, Hotpoint, Haier, Monogram, and Café models, it seamlessly integrates to maintain your washer's efficiency and longevity.
Constructed from quality materials, this component helps reduce vibrations and noise, creating a quieter laundry experience. When installed, it improves drum balance, allowing you to tackle heavy loads without worrying about wear and tear. Easy to replace, it’s an ideal solution for restoring your washer's functionality and enhancing overall wash performance. Invest in this reliable suspension rod support to ensure your appliance continues to deliver exceptional results load after load.
Weight : 0.60 lbs
Package Dimension : 8.00 x 7.50 x 1.40
DIY Guide to Replacing the GE WH01X26970 Ball Joint Upper
Replacing the ball joint upper on your GE washer is a relatively simple repair that can be done by most do-it-yourselfers. This guide will walk you through the steps of replacing the GE WH01X26970 ball joint upper in your washer.
Step 1: Unplug the Washer
Before beginning any repair, make sure to unplug the washer from the wall. This will prevent any electrical hazards while you are working.
Step 2: Remove the Top Panel
Using a screwdriver, remove the screws located at the back of the top panel and lift it off to access the internal components.
Step 3: Disconnect the Wiring Harness
Locate the wiring harness attached to the ball joint upper. Disconnect the harness by pulling out the two push connectors on either side of the electrical connections.
Step 4: Remove the Ball Joint Upper
Using an adjustable wrench, loosen the nut holding the ball joint upper in place. Once the nut is loose, pull the ball joint upper out from its mounting bracket.
Step 5: Install the New Ball Joint Upper
Carefully slide the new ball joint upper into the mounting bracket and secure it with the adjustable wrench. Reconnect the wiring harness to the electrical connections on the ball joint upper.
Step 6: Reattach the Top Panel
Reattach the top panel by lining up the screws and screwing them in place with a screwdriver.
Step 7: Plug in the Washer
Once all of the components are back in place, plug the washer back into the wall and make sure it is running properly.
Replacing the GE WH01X26970 ball joint upper is a relatively simple repair. With the help of this guide, you should be able to complete the repair quickly and safely.
Please keep in mind, these instructions are for general guidance and should always be used in conjunction with the manufacturer's manual, if available.


