Online Sale!
100% Guaranteed Genuine Parts
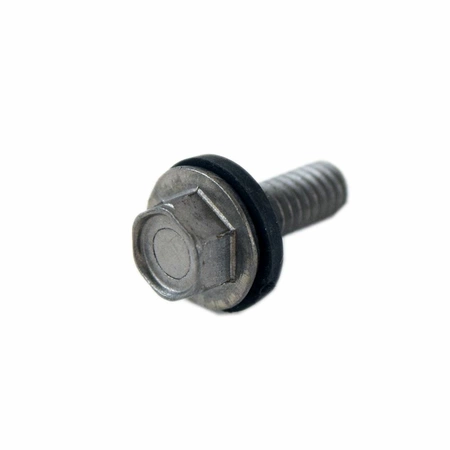
WH01X10619 GE Washer Agitator Screw Assembly
Maintain the performance of your washing machine with this essential agitator screw assembly, expertly designed for seamless compatibility with GE, Hotpoint, Haier, Monogram, and Café appliances. Crafted by GE, this reliable part ensures optimal agitation during wash cycles, promoting effective cleaning and care for your garments.
Constructed with high-quality materials, this durable screw assembly contributes to the long-lasting function of your washer, making it a smart investment for maintaining appliance efficiency. Whether you're replacing a worn-out component or performing routine maintenance, this agitator screw assembly is a crucial addition to your washer parts arsenal. Ensure your laundry experience remains hassle-free and effective with this top-tier replacement part, tailored for various GE appliance models.
Weight : 0.18 lbs
Package Dimension : 6.00 x 6.00 x 0.70
Compatible Brands


About this product
Maintain the performance of your washing machine with this essential agitator screw assembly, expertly designed for seamless compatibility with GE, Hotpoint, Haier, Monogram, and Café appliances. Crafted by GE, this reliable part ensures optimal agitation during wash cycles, promoting effective cleaning and care for your garments.
Constructed with high-quality materials, this durable screw assembly contributes to the long-lasting function of your washer, making it a smart investment for maintaining appliance efficiency. Whether you're replacing a worn-out component or performing routine maintenance, this agitator screw assembly is a crucial addition to your washer parts arsenal. Ensure your laundry experience remains hassle-free and effective with this top-tier replacement part, tailored for various GE appliance models.
Weight : 0.18 lbs
Package Dimension : 6.00 x 6.00 x 0.70
Replacing the WH01X10619 GE Ens. Tornillo Agitador
If you’ve been experiencing issues with your GE washing machine agitator, it might be time to replace its WH01X10619 Ens. Tornillo Agitador. Replacing a washing machine agitator isn’t as difficult as it may seem. Follow these easy steps and you’ll be back up and running in no time!
Step 1: Unplug the Washing Machine
Before you begin replacing the agitator, be sure to unplug the washing machine from the wall outlet. If your machine is connected to a power strip, make sure to unplug the power strip itself. This step is important for the safety of you and the machine.
Step 2: Remove the Basket
Now that your machine is safely unplugged, carefully remove the basket and set it aside in a safe place. This will provide you with better access to the agitator once you remove it.
Step 3: Remove the Agitator
Carefully grab hold of the agitator and pull upward to remove it from the base of the washer. Make sure to set it aside in a safe place, away from children and pets.
Step 4: Install the New Agitator
Unpack your new agitator and make sure it is firmly secured to the base of the washer. After it is properly secured, check to make sure it is functioning correctly.
Step 5: Reinstall the Basket
Carefully place the basket back into the washer. If it feels tight, you may need to look inside the washer to make sure everything is aligned correctly.
Step 6: Plug in the Washer
Once you have finished replacing the agitator and reinstalled the basket, you can plug the washer back into the wall outlet. Once the machine is plugged in, make sure to turn it on and check to see if the agitator is working properly.
With these few simple steps, you’ll have your GE washing machine agitator replaced quickly and easily. Be sure to follow all safety procedures when doing any type of repair work, just to be sure. Happy washing!
Please keep in mind, these instructions are for general guidance and should always be used in conjunction with the manufacturer's manual, if available.


