Online Sale!
100% Guaranteed Genuine Parts
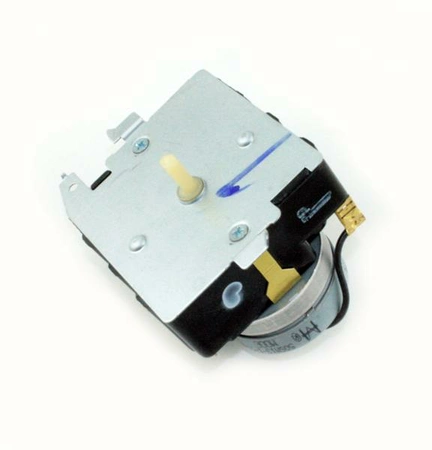
WE4M533 GE Dryer Control Timer
WE4M533 is an original equipment manufactured (OEM) part. Maintain your washing machine's performance with this high-quality control timer designed for compatibility with GE, Hotpoint, Haier, Monogram, and Café appliances. The circuit board, timer, and overlay unit ensure precise control over your wash cycles, enhancing efficiency and reliability. Whether you're replacing a malfunctioning part or performing routine maintenance, this component is built to meet rigorous standards and serves as a reliable solution for your washer. Easy to install, it allows you to get back to your laundry routine without frustration. Restore your appliance to its optimal condition and enjoy the convenience of modern functionality with this essential washer part.
Weight : 0.47 lbs
Package Dimension : 4.41 x 3.62 x 4.06
Compatible Brands


About this product
WE4M533 is an original equipment manufactured (OEM) part. Maintain your washing machine's performance with this high-quality control timer designed for compatibility with GE, Hotpoint, Haier, Monogram, and Café appliances. The circuit board, timer, and overlay unit ensure precise control over your wash cycles, enhancing efficiency and reliability. Whether you're replacing a malfunctioning part or performing routine maintenance, this component is built to meet rigorous standards and serves as a reliable solution for your washer. Easy to install, it allows you to get back to your laundry routine without frustration. Restore your appliance to its optimal condition and enjoy the convenience of modern functionality with this essential washer part.
Weight : 0.47 lbs
Package Dimension : 4.41 x 3.62 x 4.06
The following parts are replaced by this product
- WE4M364
- WE4M533-24PK
Step-by-Step Guide for Replacing Your WE4M533 GE Control Timer
1. Begin by turning off the power to the appliance that houses your GE control timer at the circuit breaker or fuse box.
2. Remove the timer's mounting screws and take out the old timer from the appliance.
3. Take your new WE4M533 GE Control Timer, and remove the jumper wire next to the motor connections at the top of the timer.
4. Ensure that any bare wires are taped so they do not come into contact with one another. This will help to reduce the risk of electrical shock or fire.
5. Connect the appropriate wiring used on the old timer to the new timer.
6. Secure the new GE Control Timer with the mounting screws removed earlier.
7. Reconnect the power supply to the appliance and turn it back on at the circuit breaker.
8. Once the power has been turned back on, cycle the timer through its operations to ensure that all settings are working correctly.
9. Your WE4M533 GE Control Timer has been successfully replaced, and you can enjoy the peace of mind from knowing a job has been done properly.
Please keep in mind, these instructions are for general guidance and should always be used in conjunction with the manufacturer's manual, if available.


