Online Sale!
100% Guaranteed Genuine Parts
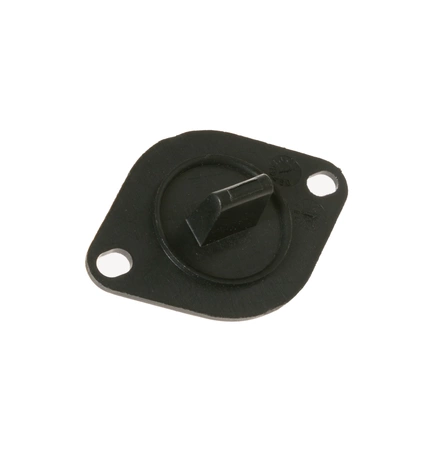
WE4M448 GE Dryer Thermistor
Ensure your washing machine operates at peak performance with this high-quality sensor and thermistor. Designed specifically for a range of GE appliances, including Hotpoint, Haier, Monogram, and Café, this part is essential for accurate temperature regulation in your washer. A malfunctioning thermistor can lead to improper wash cycles and inefficient energy use, making timely replacement crucial for optimal laundry results. This durable sensor guarantees longevity and reliable performance, so you can trust it to maintain the quality of your laundry. With an easy installation process, you’ll have your washer back up and running in no time. Perfect for both DIY enthusiasts and professionals, this replacement part is an ideal investment for effective appliance maintenance.
Weight : 0.04 lbs
Package Dimension : 1.85 x 1.57 x 2.13
Compatible Brands


About this product
Ensure your washing machine operates at peak performance with this high-quality sensor and thermistor. Designed specifically for a range of GE appliances, including Hotpoint, Haier, Monogram, and Café, this part is essential for accurate temperature regulation in your washer. A malfunctioning thermistor can lead to improper wash cycles and inefficient energy use, making timely replacement crucial for optimal laundry results. This durable sensor guarantees longevity and reliable performance, so you can trust it to maintain the quality of your laundry. With an easy installation process, you’ll have your washer back up and running in no time. Perfect for both DIY enthusiasts and professionals, this replacement part is an ideal investment for effective appliance maintenance.
Weight : 0.04 lbs
Package Dimension : 1.85 x 1.57 x 2.13
Step 1: Unplug the appliance. Disconnect the power cord from the wall outlet and turn off the circuit breaker, if applicable.
Step 2: Remove the old outlet control thermister. Carefully unscrew the mounting screws that connect the old thermistor to the outlet box. Pull out the old thermostat, taking care not to damage any wiring that is attached.
Step 3: Install the new thermostat. Place the new thermistor into the outlet box. Make sure that the wiring is connected properly and the insulating materials are securely fastened to the circuit board.
Step 4: Secure the new thermistor. Reattach the mounting screws to secure the new thermistor in place. If necessary, use a silicone sealant to help seal the installation.
Step 5: Turn on the circuit breaker. Plug the power cord back into the wall and turn the circuit breaker back on, if applicable. Check all connections to verify that everything is working correctly before proceeding.
Step 6: Test the new thermistor. Adjust the temperature setting on the new thermostat until the appliance reaches the desired temperature. Monitor the temperature over the next few days to ensure that it is working correctly.
Please keep in mind, these instructions are for general guidance and should always be used in conjunction with the manufacturer's manual, if available.


