Online Sale!
100% Guaranteed Genuine Parts
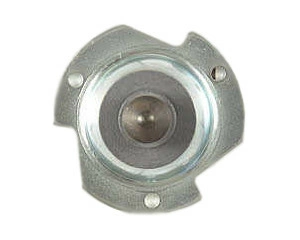
WE3M33 GE Washer Bracket
WE3M33 is an original equipment manufactured (OEM) part. This durable bracket and flange replacement is designed specifically for GE washers, ensuring a perfect fit and reliable performance. Engineered to meet high-quality standards, it is compatible with various brands, including Hotpoint, Haier, Monogram, and Café. Whether you're looking to replace a worn-out part or enhance your washer's stability, this component plays a crucial role in maintaining the overall function of your appliance. Easy to install with no specialized tools required, it provides a straightforward solution for DIY repairs. Trust in this essential part to restore your washer's performance and keep your laundry day efficient. Maintain your appliance today with this dependable bracket!
Weight : 0.04 lbs
Package Dimension : 2.32 x 1.26 x 2.09
Compatible Brands


About this product
WE3M33 is an original equipment manufactured (OEM) part. This durable bracket and flange replacement is designed specifically for GE washers, ensuring a perfect fit and reliable performance. Engineered to meet high-quality standards, it is compatible with various brands, including Hotpoint, Haier, Monogram, and Café. Whether you're looking to replace a worn-out part or enhance your washer's stability, this component plays a crucial role in maintaining the overall function of your appliance. Easy to install with no specialized tools required, it provides a straightforward solution for DIY repairs. Trust in this essential part to restore your washer's performance and keep your laundry day efficient. Maintain your appliance today with this dependable bracket!
Weight : 0.04 lbs
Package Dimension : 2.32 x 1.26 x 2.09
1. Gather the necessary tools to replace the GE WE3M33 SHAFT & BRACKET ASS'Y. You'll need a Phillips head screwdriver, a pair of pliers, and replacement parts for the shaft & bracket assembly.
2. Unscrew the mounting screws that secure the old shaft & bracket assembly to the appliance. Pull out the old shaft & bracket assembly.
3. Insert the new shaft into the slot in the bracket assembly and then secure the bracket with the mounting screws.
4. Test the new shaft & bracket assembly by pushing it to ensure it moves smoothly. If it doesn't, readjust the mounting screws and retest the appliance.
5. Once the new shaft & bracket assembly is working properly, reattach the panel over it to finish the installation.
Please keep in mind, these instructions are for general guidance and should always be used in conjunction with the manufacturer's manual, if available.


