Online Sale!
100% Guaranteed Genuine Parts
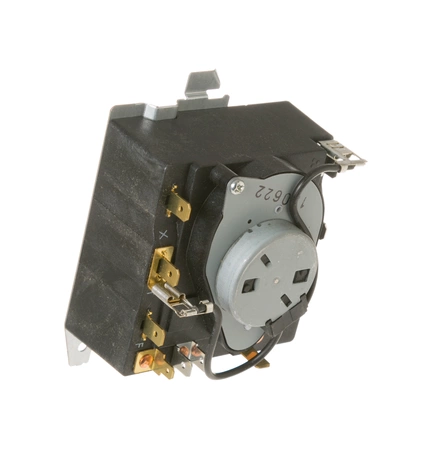
WE04X22654 GE Washer Timer
WE04X22654 is an original equipment manufactured (OEM) part. Enhance the functionality of your washing machine with this high-quality timer circuit board, designed specifically for GE appliances. Crafted to fit models from GE, Hotpoint, Haier, Monogram, and Café, this essential component ensures precise timing for a seamless washing experience. It plays a critical role in regulating cycle durations, contributing to optimal performance and efficiency. Whether you're looking to replace a worn-out timer or enhance your laundry routine, this durable part promises reliability and compatibility with various washer models. Trust this timer to help keep your laundry day running smoothly, making it an indispensable addition to your appliance maintenance toolkit.
Weight : 0.52 lbs
Package Dimension : 4.45 x 4.06 x 3.98
Compatible Brands


About this product
WE04X22654 is an original equipment manufactured (OEM) part. Enhance the functionality of your washing machine with this high-quality timer circuit board, designed specifically for GE appliances. Crafted to fit models from GE, Hotpoint, Haier, Monogram, and Café, this essential component ensures precise timing for a seamless washing experience. It plays a critical role in regulating cycle durations, contributing to optimal performance and efficiency. Whether you're looking to replace a worn-out timer or enhance your laundry routine, this durable part promises reliability and compatibility with various washer models. Trust this timer to help keep your laundry day running smoothly, making it an indispensable addition to your appliance maintenance toolkit.
Weight : 0.52 lbs
Package Dimension : 4.45 x 4.06 x 3.98
The following parts are replaced by this product
- WE4M521
Replacing the GE WE04X22654 Timer
1. Turn off the power to the appliance you’re working on. Disconnect the wires from the old timer and the control panel.
2. Place the new timer in the opening of the control panel and secure it with screws.
3. Find the ports on the back of the new timer that correspond to the wires from the control panel.
4. Connect the wires to the appropriate port on the timer, taking note of the correct polarity. The red wire should always connect to the port marked "L1".
5. Secure the wires in place with the provided wire clips on the back of the timer.
6. Reconnect the power to the appliance and test your new timer.
7. Once the timer is working, use a screwdriver to adjust the timer's settings. Make sure all settings are correct before using.
Please keep in mind, these instructions are for general guidance and should always be used in conjunction with the manufacturer's manual, if available.


