Online Sale!
100% Guaranteed Genuine Parts
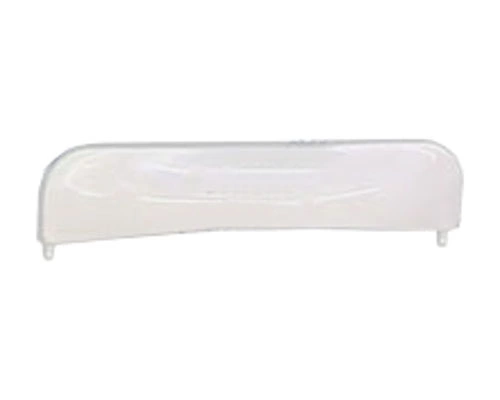
WE01X20419 GE Washer Dryer White Door Handle
Maintain your washing machine with this durable and stylish door handle designed specifically for select GE models. Crafted from high-quality materials, this replacement handle ensures a secure grip and adds a fresh look to your appliance. It's compatible with GE, Hotpoint, Haier, Monogram, and Café brands, making it a versatile choice for various laundry needs. Easily install this part to restore functionality to your washer, bringing convenience back to your laundry day routine. Perfectly engineered to fit seamlessly, this door handle is an essential accessory for maintaining the efficiency of your household appliances. Elevate your laundry experience with this reliable component.
Weight : 0.10 lbs
Package Dimension : 7.13 x 1.81 x 1.10
Compatible Brands


About this product
Maintain your washing machine with this durable and stylish door handle designed specifically for select GE models. Crafted from high-quality materials, this replacement handle ensures a secure grip and adds a fresh look to your appliance. It's compatible with GE, Hotpoint, Haier, Monogram, and Café brands, making it a versatile choice for various laundry needs. Easily install this part to restore functionality to your washer, bringing convenience back to your laundry day routine. Perfectly engineered to fit seamlessly, this door handle is an essential accessory for maintaining the efficiency of your household appliances. Elevate your laundry experience with this reliable component.
Weight : 0.10 lbs
Package Dimension : 7.13 x 1.81 x 1.10
The following parts are replaced by this product
- WE1X1188
- WE1M463
- WE1M1026
- WE01M0463
- WE01X1188
How to Replace a GE Dryer Door Handle, White (WE01X20419)
Replacing the door handle of your GE dryer is a relatively easy task that most homeowners can do themselves. Taking the time to do it right will ensure that your dryer works properly and can help prevent future problems. Follow these steps to replace a GE dryer door handle quickly and safely.
Safety First:
Before beginning any work on an appliance, ensure it is unplugged from its power source and completely drained of any residual energy.
Step 1: Locate the screws.
Look at the backside of the dryer's door, and you'll find two screws that hold the handle in place. Using a Phillips head screwdriver, loosen and remove them.
Step 2: Remove the handle.
Carefully pull the handle out of the dryer door and remove the mounting bracket.
Step 3: Install the new handle.
Take the new handle, WE01X20419, and put it into the same position that you removed the old handle from. Attach the mounting bracket to the backside of the door.
Step 4: Reattach the screws.
Replace the two screws that were removed in step 1.
Step 5: Test the handle.
Plug in the dryer and turn it on. Gently press the door handle to make sure that it's securely connected.
Following these steps, you can replace your GE dryer door handle quickly and easily. As always, take all necessary safety precautions before beginning any DIY appliance repair or installation.
Please keep in mind, these instructions are for general guidance and should always be used in conjunction with the manufacturer's manual, if available.


