Online Sale!
100% Guaranteed Genuine Parts
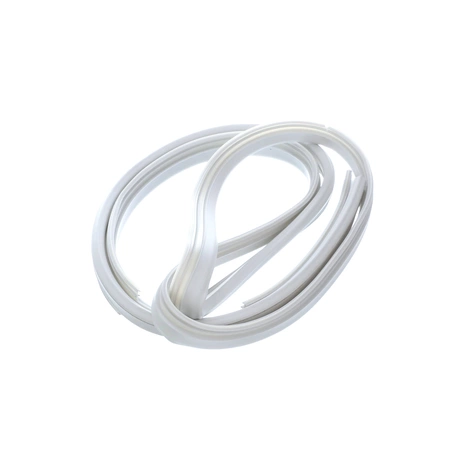
WD08X10016 GE Dishwasher Door Gasket
WD08X10016 is an original equipment manufactured (OEM) part. Ensure a perfect seal with the WD08X10016 from GE, designed specifically for select dishwasher models. This high-quality door gasket effectively prevents leaks and enhances appliance performance, contributing to efficient water usage while protecting your kitchen from potential damage.
Crafted to meet the rigorous standards of GE, Hotpoint, Haier, Monogram, and Café dishwashers, this gasket guarantees a secure fit and easy installation. By replacing worn or damaged seals, you can extend the life of your dishwasher and maintain optimal cleaning results.
Maintain your appliance with this essential component to avoid costly repairs and maintain functionality. Trust in GE's reputation for durability and quality with this reliable gasket for your dishwasher needs.
Weight : 2.22 lbs
Package Dimension : 22.00 x 10.00 x 1.40
Compatible Brands


About this product
WD08X10016 is an original equipment manufactured (OEM) part. Ensure a perfect seal with the WD08X10016 from GE, designed specifically for select dishwasher models. This high-quality door gasket effectively prevents leaks and enhances appliance performance, contributing to efficient water usage while protecting your kitchen from potential damage.
Crafted to meet the rigorous standards of GE, Hotpoint, Haier, Monogram, and Café dishwashers, this gasket guarantees a secure fit and easy installation. By replacing worn or damaged seals, you can extend the life of your dishwasher and maintain optimal cleaning results.
Maintain your appliance with this essential component to avoid costly repairs and maintain functionality. Trust in GE's reputation for durability and quality with this reliable gasket for your dishwasher needs.
Weight : 2.22 lbs
Package Dimension : 22.00 x 10.00 x 1.40
The following parts are replaced by this product
- WD8X10016
- WD08X10007
- WD8X10007
Replacing the WD08X10016 GE Door Gasket - Step-by-Step DIY Guide
This step-by-step guide will help you replace the WD08X10016 GE door gasket. This component is essential in creating a tight and secure seal that keeps your refrigerator cold and running efficiently. Follow these instructions and you’ll have your gasket replaced in no time!
Step 1: Unplug Your Refrigerator
Before you begin, make sure to disconnect any power source to your appliance. This includes unplugging the unit from the wall outlet and removing the circuit breaker from the fuse box.
Step 2: Remove the Old Gasket
You can remove the old gasket by pulling it away from the door frame. It may be helpful to use a flathead screwdriver for added leverage. Make sure to pull the old gasket away from the door frame at an angle. Pulling the gasket in a straight line can cause damage to the door frame.
Step 3: Prepare the Door Frame
Once the old gasket has been removed, clean the door frame with a damp cloth to remove any leftover residue.
Step 4: Install the New Gasket
Position the new WD08X10016 GE door gasket around the door frame. Starting at the top of the door frame, press the gasket firmly into the door frame. Make sure to keep the gasket pressed firmly against the door frame as you work your way down.
Step 5: Test the Gasket
Once the gasket has been installed, test to make sure it is in place and functioning properly. Close the door and hold it shut with your hand. If you can feel any air escaping, adjust the gasket accordingly until the seal is airtight.
Step 6: Plug in the Refrigerator
Now that you’re done, plug in the refrigerator and turn on the circuit breaker. You’re all set to enjoy a cold and efficient refrigerator once again!
Please keep in mind, these instructions are for general guidance and should always be used in conjunction with the manufacturer's manual, if available.


