Online Sale!
100% Guaranteed Genuine Parts
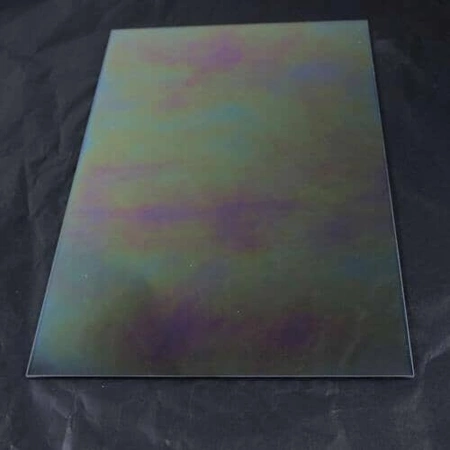
WB56T10351 GE Oven Glass Window
Maintain your oven with this high-quality glass window panel, designed for optimal performance and durability. Manufactured by GE, this replacement piece (SKU: WB56T10351) is compatible with a range of brands, including Hotpoint, Haier, Monogram, and Café, ensuring a perfect fit for your appliance.
The panel's clear, tempered glass offers excellent visibility while cooking, allowing you to monitor your meals without opening the oven door. Easy to install, this part helps maintain your oven's efficiency and aesthetic, making it a must-have for any kitchen enthusiast.
Whether you're repairing an old oven or enhancing your appliance, this glass window panel is a reliable choice that combines functionality and style. Ensure your oven remains in top condition with this essential component.
Weight : 15.09 lbs
Package Dimension : 29.20 x 18.90 x 3.80
Compatible Brands


About this product
Maintain your oven with this high-quality glass window panel, designed for optimal performance and durability. Manufactured by GE, this replacement piece (SKU: WB56T10351) is compatible with a range of brands, including Hotpoint, Haier, Monogram, and Café, ensuring a perfect fit for your appliance.
The panel's clear, tempered glass offers excellent visibility while cooking, allowing you to monitor your meals without opening the oven door. Easy to install, this part helps maintain your oven's efficiency and aesthetic, making it a must-have for any kitchen enthusiast.
Whether you're repairing an old oven or enhancing your appliance, this glass window panel is a reliable choice that combines functionality and style. Ensure your oven remains in top condition with this essential component.
Weight : 15.09 lbs
Package Dimension : 29.20 x 18.90 x 3.80
Step 1: Gather Your Materials
In order to replace your GE Glass Oven Window, you’ll need a few materials. Make sure to have the following items ready before getting started:
• WB56T10351 GE Glass Oven Window
• Phillips screwdriver
• Flathead screwdriver
• Safety glasses
Step 2: Turn off Power and Disconnect the Oven
Before beginning any repairs on your oven, it’s important to turn off power to the appliance. Unplug the power cord from wall outlet or trip the circuit breaker before moving forward.
Step 3: Remove the Oven Door
Using a Phillips screwdriver, remove the two screws inside the oven cavity that secures the upper hinges of the oven door. Position the door so that the hinges are at an angle and lift the door straight off from the oven.
Step 4: Remove Window From Door
Once the door is removed, place it face down on a flat surface. On the backside of the door, remove the two screws holding the window in place using a Phillips screwdriver. Lift the window up and out of the oven door.
Step 5: Attach the New Window
Next, insert the new window into the oven door frame and thread the two screws, previously removed, back into the door. Use a Phillips screwdriver to tighten them securely.
Step 6: Reattach the Door
Finally, reattach the oven door to the oven cavity by placing the hinges into the slots on the oven and securing them in place with the original screws.
Step 7: Test Out the Oven
Once everything is in place, plug your oven back in and turn the power on. Test out the new window to make sure it’s working properly. Enjoy your newly replaced GE glass oven window!
Please keep in mind, these instructions are for general guidance and should always be used in conjunction with the manufacturer's manual, if available.


Login and Registration Form