Online Sale!
100% Guaranteed Genuine Parts
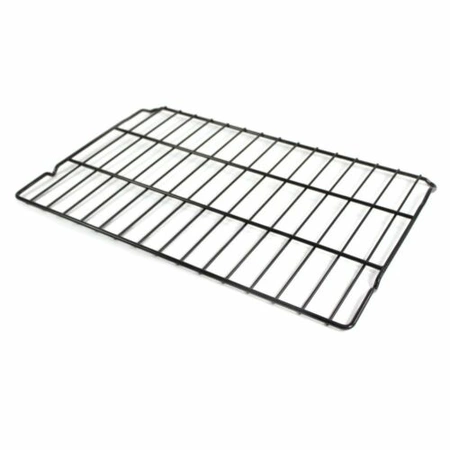
WB48T10059 GE Oven Rack
WB48T10059 is an original equipment manufactured (OEM) part. Elevate your cooking experience with this high-quality oven rack, designed for optimal performance in GE, Hotpoint, Haier, Monogram, and Café appliances. Crafted for durability, this essential rack ensures even cooking and baking, allowing for better airflow and heat distribution. Its sturdy construction can accommodate a variety of pots, pans, and broiler dishes, making it a versatile addition to your kitchen essentials. Whether you’re preparing a holiday feast or a simple weeknight meal, this rack will enhance your oven's functionality. Easy to install and maintain, it’s the perfect replacement or upgrade for your existing oven components. Maximize your culinary creativity with this dependable oven accessory.
Weight : 7.85 lbs
Package Dimension : 26.80 x 19.40 x 2.10
Compatible Brands


About this product
WB48T10059 is an original equipment manufactured (OEM) part. Elevate your cooking experience with this high-quality oven rack, designed for optimal performance in GE, Hotpoint, Haier, Monogram, and Café appliances. Crafted for durability, this essential rack ensures even cooking and baking, allowing for better airflow and heat distribution. Its sturdy construction can accommodate a variety of pots, pans, and broiler dishes, making it a versatile addition to your kitchen essentials. Whether you’re preparing a holiday feast or a simple weeknight meal, this rack will enhance your oven's functionality. Easy to install and maintain, it’s the perfect replacement or upgrade for your existing oven components. Maximize your culinary creativity with this dependable oven accessory.
Weight : 7.85 lbs
Package Dimension : 26.80 x 19.40 x 2.10
The following parts are replaced by this product
- WB48T10051
DIY Guide to Replacing a GE WB48T10059 Rack Oven (GY)
Replacing a GE WB48T10059 Rack Oven (GY) can seem intimidating, but with the help of this guide you will be able to complete the task with ease. This DIY guide will cover all the steps from preparation to installation of the new oven. Let’s get started!
Preparation
1. Read through the installation instructions provided with your new oven and make sure you have the necessary tools on hand. You may need a wrench, screwdriver, and/or pliers.
2. Shut off power to the oven by turning off the breaker in your circuit box.
3. Disconnect the electricity supply to the oven, if it is connected.
4. Remove any shelves or racks that are in the oven.
5. If there is an existing wiring harness, disconnect it and remove the double wall oven connector.
Installation
1. Take the new oven and place it in the cabinet.
2. Secure the oven to the cabinet with the appropriate screws. Make sure the screws are tight so the oven is secure.
3. Connect the wiring harness for the oven. Make sure to match the colors of the wiring and attach them to the appropriate terminals.
4. Attach the double oven connector to the wall and make sure it is secure.
5. Turn on the breaker in the circuit box and test out the oven.
6. Reinstall any shelves or racks that were removed before.
Congratulations, you have successfully replaced your GE WB48T10059 Rack Oven (GY)! If you have followed this guide step-by-step you should now have a working oven that is ready to be used.
Please keep in mind, these instructions are for general guidance and should always be used in conjunction with the manufacturer's manual, if available.
Please Verify Your Purchase to Submit a Review
Please note: We use this information only to confirm your purchase, it won’t be published.


