Online Sale!
100% Guaranteed Genuine Parts
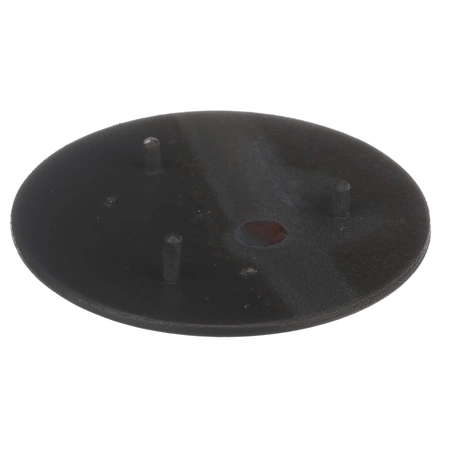
WB29K10023 GE Oven Burner Cap Assembly
Maintain your cooking performance with this essential gas burner cap assembly, designed specifically for compatibility with a range of leading appliance brands. Crafted by GE, this durable component ensures optimal heat distribution and efficiency for your oven, making it an indispensable addition to your kitchen. Tailored for use with GE, Hotpoint, Haier, Monogram, and Café ovens, the assembly is engineered to fit seamlessly with various models, simplifying your replacement process. Whether you're an avid home cook or a culinary enthusiast, maintaining your oven's performance is crucial, and this burner cap is a reliable solution. Invest in this quality part to ensure consistent results and elevate your cooking experience.
Weight : 0.17 lbs
Package Dimension : 3.39 x 3.11 x 0.75
Compatible Brands


About this product
Maintain your cooking performance with this essential gas burner cap assembly, designed specifically for compatibility with a range of leading appliance brands. Crafted by GE, this durable component ensures optimal heat distribution and efficiency for your oven, making it an indispensable addition to your kitchen. Tailored for use with GE, Hotpoint, Haier, Monogram, and Café ovens, the assembly is engineered to fit seamlessly with various models, simplifying your replacement process. Whether you're an avid home cook or a culinary enthusiast, maintaining your oven's performance is crucial, and this burner cap is a reliable solution. Invest in this quality part to ensure consistent results and elevate your cooking experience.
Weight : 0.17 lbs
Package Dimension : 3.39 x 3.11 x 0.75
Replacing the WB29K10023 GE Burner Cap Assembly
Tools Needed:
-Replacement burner cap assembly
-Phillips screwdriver
-Flathead screwdriver
Instructions:
1. Before you start, ensure that your range's power has been disconnected from the electrical outlet.
2. Now, locate the existing burner cap assembly. The burner cap assembly will usually be located directly above the burner grate.
3. Using a Phillips screwdriver, remove the screws holding the burner cap in place. Be sure to keep track of which screw goes into which hole as you remove them.
4. Once the screws have been removed, carefully remove the old burner cap assembly and discard it.
5. Take the new replacement burner cap assembly and insert it into the same hole as the old one.
6. Using the screws you removed previously, secure the new burner cap assembly into place. Make sure the screws are tightened firmly.
7. Reconnect the power to the range and turn on the burner. If the burner ignites, you have successfully replaced the burner cap assembly.
8. If the burner does not ignite, check that all connections were made properly and ensure that the burner cap is securely in place.
Please keep in mind, these instructions are for general guidance and should always be used in conjunction with the manufacturer's manual, if available.


