Online Sale!
100% Guaranteed Genuine Parts
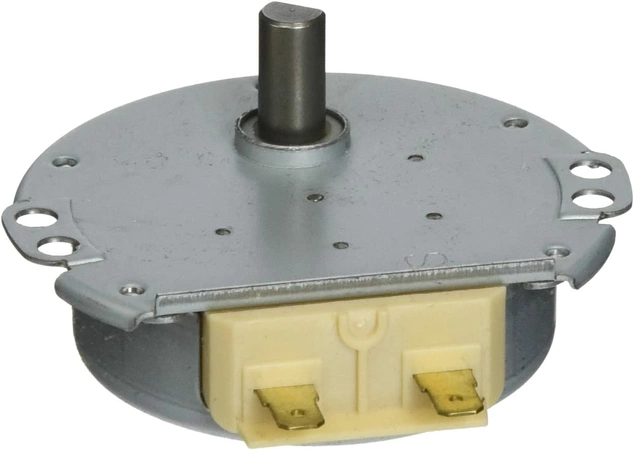
WB26X10233 GE Oven Turntable Motor
Ensure your cooking experience remains uninterrupted with this essential turntable motor designed for GE ovens. This high-quality component, compatible with popular brands like Hotpoint, Haier, Monogram, and Café, guarantees smooth rotation of your oven’s turntable, promoting even cooking and heating. The WB26X10233 part is built to exacting standards, ensuring a reliable and durable performance that can withstand the rigors of daily use. Ideal for repairs or replacements, this motor will help restore your oven's functionality, making it easy to achieve perfectly cooked meals. Maintain your kitchen with this indispensable appliance part and enjoy the convenience it brings to your culinary adventures.
Weight : 0.21 lbs
Package Dimension : 6.57 x 3.07 x 1.42
Compatible Brands


About this product
Ensure your cooking experience remains uninterrupted with this essential turntable motor designed for GE ovens. This high-quality component, compatible with popular brands like Hotpoint, Haier, Monogram, and Café, guarantees smooth rotation of your oven’s turntable, promoting even cooking and heating. The WB26X10233 part is built to exacting standards, ensuring a reliable and durable performance that can withstand the rigors of daily use. Ideal for repairs or replacements, this motor will help restore your oven's functionality, making it easy to achieve perfectly cooked meals. Maintain your kitchen with this indispensable appliance part and enjoy the convenience it brings to your culinary adventures.
Weight : 0.21 lbs
Package Dimension : 6.57 x 3.07 x 1.42
1. Start by disconnecting the power to the microwave by unplugging it from the wall outlet.
2. Remove the screws located on the top and side of the microwave cabinet.
3. Carefully remove the outer cabinet as well as the inner components such as the tray and any other accessories.
4. Locate the GEWB26X10233 turntable motor, which is usually located underneath the tray.
5. Using a screwdriver, unscrew the four screws holding the motor in place.
6. Disconnect the wires connected to the old motor and make sure to remember which wire goes where.
7. Install the new motor in the same place as the old one and make sure to reconnect the wires securely.
8. Secure the motor with the four screws and replace the inner cabinet.
9. Reattach the outer cabinet and re-connect the power to the microwave.
10. Test the microwave to ensure the new motor is working correctly.
Please keep in mind, these instructions are for general guidance and should always be used in conjunction with the manufacturer's manual, if available.


