Online Sale!
100% Guaranteed Genuine Parts
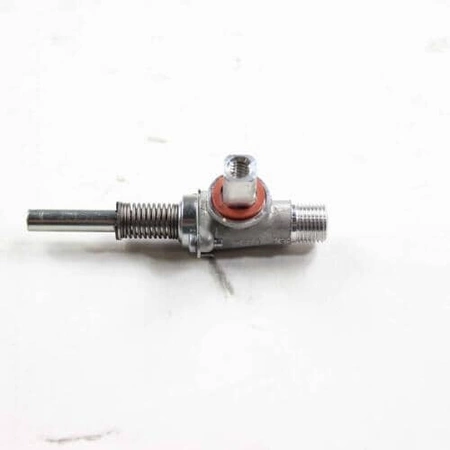
WB21X20470 GE Range Burner Valve
Ensure your cooking experience remains seamless with the high-quality gas burner and control valve designed for various GE appliances. This essential component, specifically engineered for models from GE, Hotpoint, Haier, Monogram, and Café, guarantees reliable performance and precision heat control. Crafted for durability and longevity, it replaces old or faulty valves to restore your oven's functionality.
This part is ideal for anyone looking to maintain efficient cooking conditions in their kitchen. Easy to install, the valve enhances the overall safety and reliability of your gas oven. Trust in this dependable solution to keep your meals perfectly cooked every time. Maintain your appliance parts today and enjoy optimal performance from your oven!
Weight : 0.05 lbs
Package Dimension : 3.07 x 1.30 x 1.57
Compatible Brands


About this product
Ensure your cooking experience remains seamless with the high-quality gas burner and control valve designed for various GE appliances. This essential component, specifically engineered for models from GE, Hotpoint, Haier, Monogram, and Café, guarantees reliable performance and precision heat control. Crafted for durability and longevity, it replaces old or faulty valves to restore your oven's functionality.
This part is ideal for anyone looking to maintain efficient cooking conditions in their kitchen. Easy to install, the valve enhances the overall safety and reliability of your gas oven. Trust in this dependable solution to keep your meals perfectly cooked every time. Maintain your appliance parts today and enjoy optimal performance from your oven!
Weight : 0.05 lbs
Package Dimension : 3.07 x 1.30 x 1.57
Step 1: Unplug Your GE Stove
Before starting any repair work, make sure to unplug your GE stove from its power source. Doing so will eliminate any possibility of electrical shock or other hazards.
Step 2: Access the Burner Valve
Locate the burner valve by locating the screws in the back of the stove that secure the burner valve assembly in place. Using a Phillips head screwdriver, remove the screws and carefully lift the burner valve out of the stove.
Step 3: Remove the Old Burner Valve
Now that you’ve accessed the burner valve, remove the old burner valve from its housing. Carefully disconnect the two wires connected to the valve and use needle-nose pliers to remove the nuts from the valve.
Step 4: Install the New Burner Valve
Once the old valve is removed, place the new WB21X20470 GE Stove Burner Valve in the housing and reconnect the two wires. Secure the valve in place using the nuts and washers that came with the new valve.
Step 5: Test the Burner Valve
Before putting the burner valve back into the stove, test the valve to ensure it is working properly. Plug the stove back in and turn on the burner. To test the valve, adjust the temperature settings and watch the flame size change. If the flame size does not change, shutoff the burner and recheck the connections.
Step 6: Reinstall the Burner Valve
Reinstall the burner valve by reversing the steps used to remove it. Secure the burner valve in its original position using the screws that were previously removed.
Step 7: Power Up the Stove
Plug the stove back into a power source and turn on the burner. If all of the steps have been completed correctly, the burner should function normally. If there are any issues with the burner, repeat the previous steps or call a professional for help.
Please keep in mind, these instructions are for general guidance and should always be used in conjunction with the manufacturer's manual, if available.


