Online Sale!
100% Guaranteed Genuine Parts
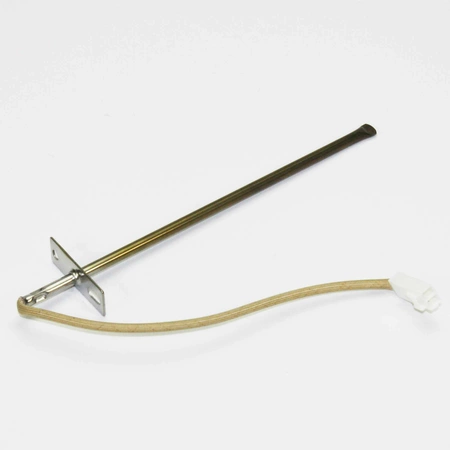
WB20K10027 GE Range Temperature Sensor
WB20K10027 is an original equipment manufactured (OEM) part. Ensure your oven operates at optimal performance with the WB20K10027 temperature sensor from GE. Designed to provide precise temperature readings, this high-quality sensor and thermistor is an essential component for maintaining consistent cooking results. Compatible with a range of brands, including Hotpoint, Haier, Monogram, and Café, it seamlessly fits into various oven models.
This reliable part helps in accurately measuring oven temperature, allowing you to achieve the perfect bake every time. Whether you are replacing a faulty sensor or upgrading your appliance, the WB20K10027 guarantees durability and top-notch functionality. Make cooking a pleasure with this indispensable oven part, ensuring you’re prepared for every culinary challenge.
Weight : 0.14 lbs
Package Dimension : 7.09 x 4.92 x 0.55
Compatible Brands


About this product
WB20K10027 is an original equipment manufactured (OEM) part. Ensure your oven operates at optimal performance with the WB20K10027 temperature sensor from GE. Designed to provide precise temperature readings, this high-quality sensor and thermistor is an essential component for maintaining consistent cooking results. Compatible with a range of brands, including Hotpoint, Haier, Monogram, and Café, it seamlessly fits into various oven models.
This reliable part helps in accurately measuring oven temperature, allowing you to achieve the perfect bake every time. Whether you are replacing a faulty sensor or upgrading your appliance, the WB20K10027 guarantees durability and top-notch functionality. Make cooking a pleasure with this indispensable oven part, ensuring you’re prepared for every culinary challenge.
Weight : 0.14 lbs
Package Dimension : 7.09 x 4.92 x 0.55
Step 1: Shut off the power to the appliance. Make sure you unplug any power cords leading to the appliance, or shut off the breaker that is supplying power to the appliance.
Step 2: Remove the back panel from the appliance. Depending on your appliance, it may just be clipped in or you may need a few screws to unscrew to get the panel off.
Step 3: Locate and identify the GE WB20K10027 Temperature Sensor. It may look different than the picture – but should still have the same wiring connections.
Step 4: Disconnect the wiring harness lead attached to the sensor. Pull the wires straight up and off, instead of twisting them when removing.
Step 5: Remove the two screws, or other fasteners, holding the sensor into place.
Step 6: Remove the defective GE WB20K10027 Temperature Sensor and discard it.
Step 7: Install the new GE WB20K10027 Temperature Sensor into position. Replace the two screws, or other fasteners.
Step 8: Reconnect the wiring harness lead attached to the sensor, making sure it is snug.
Step 9: Replace the back panel and re-attach it securely.
Step 10: Restore power to the appliance and test the unit to make sure that it is working properly.
Please keep in mind, these instructions are for general guidance and should always be used in conjunction with the manufacturer's manual, if available.


