Online Sale!
100% Guaranteed Genuine Parts
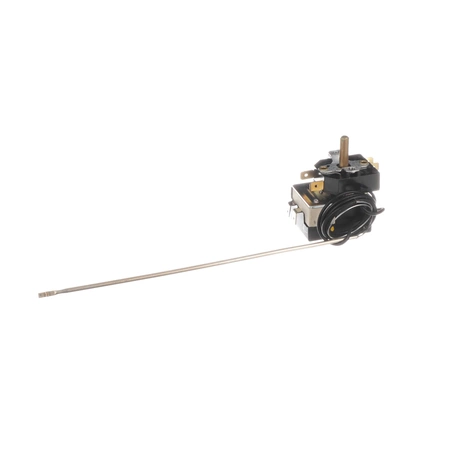
WB20K10026 GE Range Thermostat
WB20K10026 is an original equipment manufactured (OEM) part. Ensure your oven operates at peak performance with this reliable thermostat from GE. Designed for consistent temperature regulation, it enhances your cooking experience by delivering accurate heating levels. This part is compatible with a wide range of brands including Hotpoint, Haier, Monogram, and Café, making it a versatile choice for your kitchen repair needs.
Easy to install and built to last, this thermostat guarantees precise control over your oven's temperature, allowing for perfectly baked goods and evenly cooked meals. Whether you’re an avid baker or a casual cook, integrating this essential part into your appliance will help maintain optimal functionality. Maintain your oven with this quality thermostat to enhance your culinary endeavors and keep meals on point.
Weight : 1.03 lbs
Package Dimension : 10.98 x 3.62 x 3.58
Compatible Brands


About this product
WB20K10026 is an original equipment manufactured (OEM) part. Ensure your oven operates at peak performance with this reliable thermostat from GE. Designed for consistent temperature regulation, it enhances your cooking experience by delivering accurate heating levels. This part is compatible with a wide range of brands including Hotpoint, Haier, Monogram, and Café, making it a versatile choice for your kitchen repair needs.
Easy to install and built to last, this thermostat guarantees precise control over your oven's temperature, allowing for perfectly baked goods and evenly cooked meals. Whether you’re an avid baker or a casual cook, integrating this essential part into your appliance will help maintain optimal functionality. Maintain your oven with this quality thermostat to enhance your culinary endeavors and keep meals on point.
Weight : 1.03 lbs
Package Dimension : 10.98 x 3.62 x 3.58
The following parts are replaced by this product
- WB20K10011
1. Turn off the power source to the thermostat. Always disconnect from the power source before removing the existing thermostat for health and safety.
2. Remove the existing thermostat. Depending on the setup, remove the mounting screws from the wall or the wiring from the back of the thermostat.
3. Install the mounting plate for the new thermostat. If you don't already have it installed, attach the mounting plate to the wall using the provided screws.
4. Connect the wiring to the terminals at the back of the thermostat. Use the wiring diagram to identify which wire goes to which terminal on the new thermostat.
5. Secure the thermostat onto the mounting plate. Ensure the wires are not pinched or pulled when securing the thermostat to the plate.
6. Restore power and test. Turn the power back on and test the thermostat to ensure it works properly.
Please keep in mind, these instructions are for general guidance and should always be used in conjunction with the manufacturer's manual, if available.


