Online Sale!
100% Guaranteed Genuine Parts
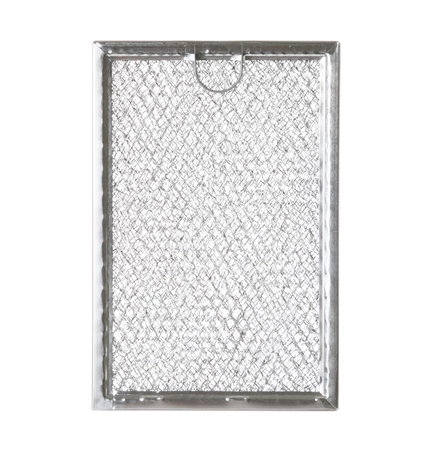
WB06X10359 GE Grease Filter Replacement
WB06X10359 is an original equipment manufactured (OEM) part. Ensure optimal performance and air quality in your kitchen with this high-quality grease filter replacement. Designed for GE, Hotpoint, Haier, Monogram, and Café microwaves, this filter effectively traps grease and airborne particles, allowing your appliance to function efficiently and maintain its appearance. With a precise fit for various models, installation is straightforward, helping you keep your microwave running smoothly. Regular replacement of your grease filter not only enhances appliance performance but also contributes to a cleaner cooking environment. Invest in this essential component to uphold the quality and longevity of your microwave. Perfect for maintaining a fresh and efficient kitchen atmosphere, this filter is a reliable choice for any cooking enthusiast.
Weight : 1.51 lbs
Package Dimension : 10.91 x 7.09 x 2.72
Compatible Brands


About this product
WB06X10359 is an original equipment manufactured (OEM) part. Ensure optimal performance and air quality in your kitchen with this high-quality grease filter replacement. Designed for GE, Hotpoint, Haier, Monogram, and Café microwaves, this filter effectively traps grease and airborne particles, allowing your appliance to function efficiently and maintain its appearance. With a precise fit for various models, installation is straightforward, helping you keep your microwave running smoothly. Regular replacement of your grease filter not only enhances appliance performance but also contributes to a cleaner cooking environment. Invest in this essential component to uphold the quality and longevity of your microwave. Perfect for maintaining a fresh and efficient kitchen atmosphere, this filter is a reliable choice for any cooking enthusiast.
Weight : 1.51 lbs
Package Dimension : 10.91 x 7.09 x 2.72
The following parts are replaced by this product
- WB06X10359-10PK
Replacing the WB06X10359 GE Grease Filter
This guide will provide steps to help you replace the WB06X10359 GE Grease Filter. This filter is used in several GE microwave ovens and helps keep your appliance functioning properly by catching grease and other cooking particles before they enter other components of the microwave.
Tools Needed:
• Phillips head screwdriver
• Replacement WB06X10359 GE grease filter
Instructions:
1. Unplug the microwave oven from the wall socket.
2. Open the door of the microwave oven and remove any mounting screws that are located inside.
3. Carefully pull the microwave away from the wall, so that the back of the appliance is visible.
4. Locate the existing grease filter and use a Phillips head screwdriver to unscrew the mounting screws that hold it in place.
5. Pull the old grease filter out of the microwave oven and discard it.
6. Take the replacement filter and place it in the same location that the old filter was.
7. Secure the filter with the mounting screws and make sure it is held firmly in place.
8. Push the microwave oven back against the wall and reattach any mounting screws that were removed.
9. Plug the power cord back into the wall socket and test the microwave oven.
Your new WB06X10359 GE Grease Filter has been successfully installed. Enjoy your newly working microwave oven!
Please keep in mind, these instructions are for general guidance and should always be used in conjunction with the manufacturer's manual, if available.


