Online Sale!
100% Guaranteed Genuine Parts
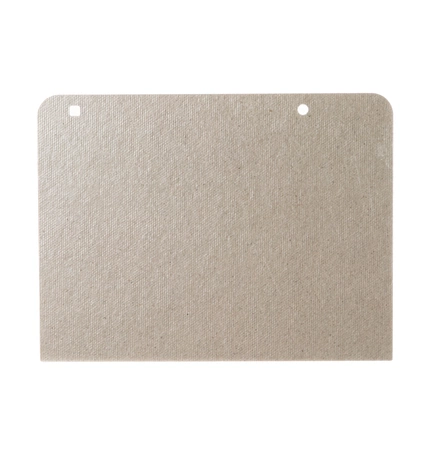
WB06X10254 GE Microwave Waveguide Cover
WB06X10254 is an original equipment manufactured (OEM) part. Elevate your cooking experience with the WB06X10254 microwave waveguide cover, expertly designed for GE appliances. This essential part ensures optimal microwave performance by directing heat efficiently, thereby enhancing your cooking results. Crafted specifically for GE, Hotpoint, Haier, Monogram, and Café brands, it provides a reliable fit for various models.
Constructed from durable materials, this cover shields the waveguide, preventing grease buildup and ensuring consistent heating. Replacing old or damaged waveguide covers can significantly improve microwave functionality and longevity. Simple to install, it makes maintaining your oven hassle-free. Maintain your appliance's performance and enjoy perfectly cooked meals every time with this quality component.
Weight : 0.10 lbs
Package Dimension : 14.00 x 9.50 x 0.10
Compatible Brands


About this product
WB06X10254 is an original equipment manufactured (OEM) part. Elevate your cooking experience with the WB06X10254 microwave waveguide cover, expertly designed for GE appliances. This essential part ensures optimal microwave performance by directing heat efficiently, thereby enhancing your cooking results. Crafted specifically for GE, Hotpoint, Haier, Monogram, and Café brands, it provides a reliable fit for various models.
Constructed from durable materials, this cover shields the waveguide, preventing grease buildup and ensuring consistent heating. Replacing old or damaged waveguide covers can significantly improve microwave functionality and longevity. Simple to install, it makes maintaining your oven hassle-free. Maintain your appliance's performance and enjoy perfectly cooked meals every time with this quality component.
Weight : 0.10 lbs
Package Dimension : 14.00 x 9.50 x 0.10
How to Replace a GE WB06X10254 Wave Guide Cover
Replacing a worn wave guide cover on a GE microwave oven can help keep the appliance running efficiently. The part you will need is the GE WB06X10254 Wave Guide Cover. This guide will take you through the steps needed to replace it.
What You Will Need:
- Phillips head screwdriver
- Flat head screwdriver
- GE WB06X10254 Wave Guide Cover
Instructions:
1. Unplug the microwave oven from the wall socket, and if necessary, remove the clips that secure the oven to the cabinet.
2. Carefully slide the oven away from the wall to gain access to the rear panel.
3. Using a Phillips head screwdriver, carefully unscrew the screws that hold the rear panel in place.
4. Gently remove the rear panel of the oven and set it aside.
5. Locate the wave guide cover near the fan motor. It should be rectangular in shape and is made of metal.
6. Using a flat head screwdriver, carefully pry off the wave guide cover and remove it from the oven.
7. Take the new GE WB06X10254 wave guide cover and align it with the hole where the previous one was located.
8. Using the same screwdriver, carefully press the new wave guide cover into place.
9. Reattach the rear panel of the oven, tightening the screws firmly.
10. Carefully slide the oven back into its original position and reattach the clips if necessary.
11. Plug the oven in to the wall socket, and you have now successfully replaced the GE WB06X10254 wave guide cover.
Congratulations! You have now successfully replaced the wave guide cover on your GE microwave oven. As time passes, remember to check your oven periodically for any signs of wear or damage. Replacing any parts immediately can help keep your appliance running efficiently and can also keep your family safe.
Please keep in mind, these instructions are for general guidance and should always be used in conjunction with the manufacturer's manual, if available.
Please Verify Your Purchase to Submit a Review
Please note: We use this information only to confirm your purchase, it won’t be published.


