Online Sale!
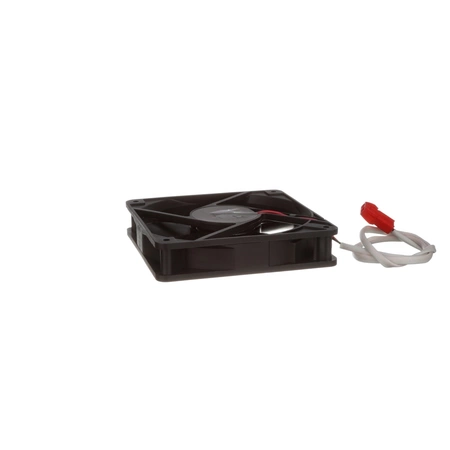
Z-DG7-3 Avanti Axial Fan
Evaporator fan works with some Avanti Products models of wine coolers.
Compatible Brands

About this product
Evaporator fan works with some Avanti Products models of wine coolers.
The following parts are replaced by this product
- AVJG50EJ038
No more associated models for this part.
DIY Guide: How to Replace the Z-DG7-3 Avanti Products Wine Cooler Evaporator Fan
Whether you’re a DIYer or a wine enthusiast, making sure your Z-DG7-3 Avanti Products Wine Cooler Evaporator Fan is working properly is essential for keeping your collection chilled and safe. This short guide will help walk you through the process of replacing the fan, so you can get back to sipping on your favorite vintages in no time.
Tools You’ll Need :
-Phillips head screwdriver
-Needle nose pliers
-A new replacement fan
-A cloth or dust rag
Step 1: Unplug and Disconnect the Wine Cooler
Unplug the wine cooler from the outlet and make sure it’s completely disconnected from any power source before beginning. Unscrew the screws at the back of the unit to open the back panel.
Step 2: Locate the Evaporator Fan
There will be a small fan located near the compressor, on the evaporator coil. Gently remove it with needle nose pliers.
Step 3: Clean the Area Around the Fan
With a dust rag or cloth, clean the area around the fan compartment before installing the new one. This will ensure that the fan runs efficiently, since dust buildup could interfere with its function.
Step 4: Install the Replacement Fan
Take your new replacement fan and gently insert it into the fan compartment, making sure the wires are facing the correct direction. Secure the fan with two screws and reconnect the wiring.
Step 5: Replace the Back Panel
Replace the back panel and screw it back into place. Make sure the screws are tight.
Step 6: Plug in the Wine Cooler
Finally, plug the wine cooler back into the outlet, and you’re done! Your Z-DG7-3 Avanti Products Wine Cooler should now be working properly. Enjoy!
Please keep in mind, these instructions are for general guidance and should always be used in conjunction with the manufacturer's manual, if available.


