Online Sale!
100% Guaranteed Genuine Parts
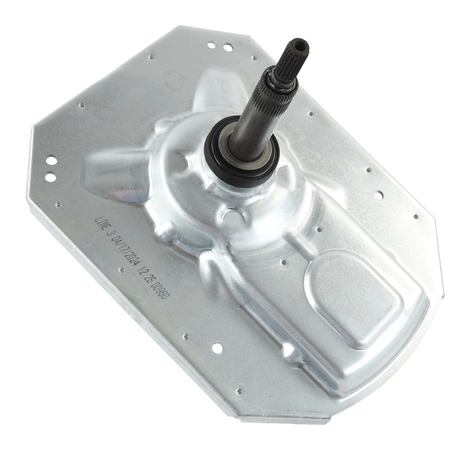
W11454372 Whirlpool Transmission Assembly
Whirlpool W11454372 GEARCASE We're your #1 source for genuine OEM appliance parts. Contact us for further questions as well as any other appliance parts needs!
Weight : 41.451900 lbs
Dimension : 17.440900 x 13.622000 x 24.251900
Compatible Brands


About this product
Whirlpool W11454372 GEARCASE We're your #1 source for genuine OEM appliance parts. Contact us for further questions as well as any other appliance parts needs!
Weight : 41.451900 lbs
Dimension : 17.440900 x 13.622000 x 24.251900
The following parts are replaced by this product
- W10469846
- W10469845
- W10739660
- W10735106
- W10806333
- W10772256
- W11048203
- W11035747
No more associated models for this part.
Step 1: Disconnect Power. Before beginning any repair or maintenance, disconnect the power supply to the appliance in question to ensure you’re working in a safe environment.
Step 2: Grab the Proper Tools. As with any task, having the right tools for the job is essential. You’ll need a Phillips-head screwdriver and a crescent wrench or socket set to get started.
Step 3: Remove the Washer Top. Use the Phillips-head screwdriver to remove the screws placed around the perimeter of the washer's top. If the screws are hard to remove, apply a mild lubricant to help loosen them up.
Step 4: Unplug Wire Harnesses. After removing the top of the washer, unplug all of the wire harnesses from their respective connectors.
Step 5: Remove the Gearcase. Use your crescent wrench or socket set to loosen and remove all of the screws holding the gearcase in place. Once all of the screws are removed, you can slide the gearcase out of place.
Step 6: Install New Gearcase Assembly. Slide the new gearcase assembly into place and secure all of the screws one by one.
Step 7: Reattach Wire Harnesses. Reattach all of the wire harnesses to the correct connectors.
Step 8: Reattach Washer Top. Place the washer top back on the unit and tighten the screws with your Phillips-head screwdriver.
Step 9: Reconnect Power. Once the job is complete, reconnect the power and test the unit to ensure it is working correctly.
Please keep in mind, these instructions are for general guidance and should always be used in conjunction with the manufacturer's manual, if available.
Write Your Own Review


