Online Sale!
100% Guaranteed Genuine Parts
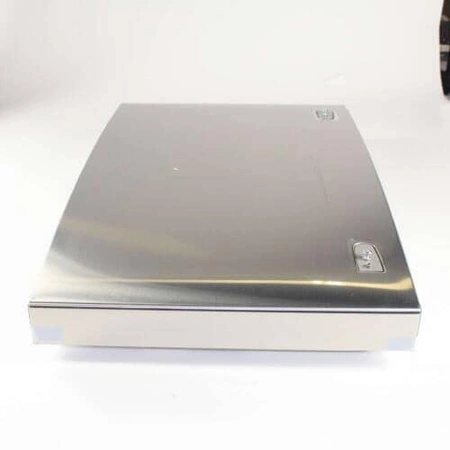
DA82-02129A Samsung Refrigerator Freezer Door Assembly
Maintain your Samsung refrigerator with this premium freezer door assembly, designed specifically for a seamless fit and optimal performance. Crafted for durability, this replacement part ensures your appliance functions at its best, maintaining freshness and efficiency in your kitchen.
Engineered to meet Samsung's high standards, this door assembly is an ideal solution for those looking to restore their refrigerator's integrity. Ease of installation means less downtime for your appliance, allowing you to keep your food items organized and properly stored.
Whether you're a DIY enthusiast or a professional technician, this reliable part simplifies the repair process, providing the quality and longevity that Samsung products are known for. Keep your kitchen running smoothly with this essential refrigerator component.
Weight : 82.974700 lbs
Dimension : 39.370100 x 35.433100 x 8.267700
Compatible Brands

About this product
Maintain your Samsung refrigerator with this premium freezer door assembly, designed specifically for a seamless fit and optimal performance. Crafted for durability, this replacement part ensures your appliance functions at its best, maintaining freshness and efficiency in your kitchen.
Engineered to meet Samsung's high standards, this door assembly is an ideal solution for those looking to restore their refrigerator's integrity. Ease of installation means less downtime for your appliance, allowing you to keep your food items organized and properly stored.
Whether you're a DIY enthusiast or a professional technician, this reliable part simplifies the repair process, providing the quality and longevity that Samsung products are known for. Keep your kitchen running smoothly with this essential refrigerator component.
Weight : 82.974700 lbs
Dimension : 39.370100 x 35.433100 x 8.267700
No more associated models for this part.
Replacing the 3045EL1002P LG Dryer Drum Tub Assembly
Instructions
1. Unplug the dryer from the power outlet and remove the lint screen.
2. Take off the lint filter housing by unscrewing the two screws on the bottom of the dryer.
3. Slide the top panel of the dryer up and off.
4. Unscrew the drum’s four screws on the outer ring.
5. Disconnect the wiring harness connecting the drum to the motor.
6. Pull the drum out of the dryer housing.
7. Remove the old drum tub assembly by using a screwdriver to remove the screws on the side of the assembly.
8. Slide the new 3045EL1002P LG Dryer Drum Tub Assembly into the dryer housing.
9. Reconnect the wiring harness back to the motor.
10. Screw the outer ring of the drum back into the housing.
11. Slide the top panel of the dryer back onto the housing.
12. Replace the lint filter housing and securely screw it in place.
13. Replace the lint screen and plug the dryer back into the power outlet.
14. Test the dryer by running it on a high-heat cycle.
Please keep in mind, these instructions are for general guidance and should always be used in conjunction with the manufacturer's manual, if available.
Write Your Own Review


