Online Sale!
100% Guaranteed Genuine Parts
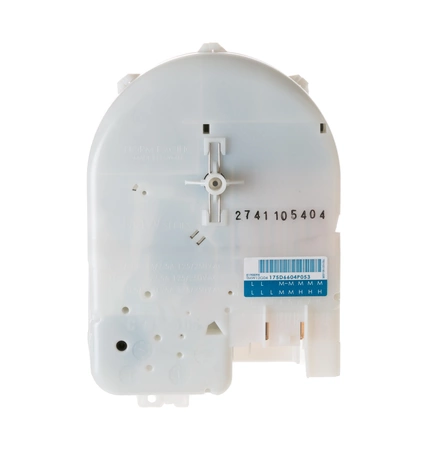
WH12X10527 GE Washer Timer Control
WH12X10527 is an original equipment manufactured (OEM) part. Maintain your laundry experience with this high-quality circuit board timer control, designed to enhance the performance of your washer. Perfectly compatible with trusted brands such as GE, Hotpoint, Haier, Monogram, and Café, this essential part ensures your appliance operates smoothly and efficiently.
Engineered for durability and reliability, the timer control regulates wash cycles to provide precise timing for all your laundry needs. Whether you're dealing with delicate fabrics or heavy loads, this component is a vital addition to maintain the functionality of your washing machine.
Easy to install, this part will have your washer back in top shape in no time. Invest in this reliable circuit board timer control to extend the life of your appliance and improve your home laundry routine. Perfect for any DIY repairs or maintenance projects!
Weight : 2.340500 lbs
Dimension : 11.500000 x 6.900000 x 4.100000
Compatible Brands


About this product
WH12X10527 is an original equipment manufactured (OEM) part. Maintain your laundry experience with this high-quality circuit board timer control, designed to enhance the performance of your washer. Perfectly compatible with trusted brands such as GE, Hotpoint, Haier, Monogram, and Café, this essential part ensures your appliance operates smoothly and efficiently.
Engineered for durability and reliability, the timer control regulates wash cycles to provide precise timing for all your laundry needs. Whether you're dealing with delicate fabrics or heavy loads, this component is a vital addition to maintain the functionality of your washing machine.
Easy to install, this part will have your washer back in top shape in no time. Invest in this reliable circuit board timer control to extend the life of your appliance and improve your home laundry routine. Perfect for any DIY repairs or maintenance projects!
Weight : 2.340500 lbs
Dimension : 11.500000 x 6.900000 x 4.100000
Replacing the WH12X10527 GE Control Timer: A DIY Guide
Are you looking to replace your GE Control Timer? If so, you've come to the right place. Replacing a control timer can be daunting, but this DIY guide will help make the process easier. So let's get started.
Step 1: Unplug the power cord from the wall outlet. It's always important to ensure that your appliance is completely disconnected from any power source before beginning work.
Step 2: Open the control panel and locate the timer. The timer is typically located near the control board, though the exact location can vary by model.
Step 3: Unscrew the screws or bolts holding the timer in place. Once the screws or bolts have been removed, carefully remove the timer from the control panel.
Step 4: Install the new timer. Place the new timer in the same position as the old one and secure it with screws or bolts.
Step 5: Plug the power cord back in and turn on the power switch. Ensure the timer is functioning properly before moving on to the next step.
Step 6: Test the appliance. Once the timer has been replaced, it's important to test the appliance to ensure it is working correctly.
Step 7: Reassemble the appliance and clean it up. Make sure all the appliance components have been securely fastened before putting them all back together. When you're finished, tidy up any leftover tools or materials.
Congratulations! You've successfully replaced the WH12X10527 GE Control Timer.
Please keep in mind, these instructions are for general guidance and should always be used in conjunction with the manufacturer's manual, if available.
Write Your Own Review


